
You want to know when to change your motorcycle brake pads and get back on the road safely. Replace pads when the friction material is worn down to about 1/16 inch (1.5 mm) or sooner if you notice reduced stopping power, grinding noises, or increased lever travel. I’ll show you how to spot these signs and estimate life based on riding style and pad type.
Check pads often—every few thousand miles or whenever you service the bike—because lifespan varies widely with traffic, riding style, and pad compound. I’ll also cover how riding habits shorten pad life, how to pick the right replacement, and when to let a pro handle the job so you avoid costly damage.
Key Takeaways
- Inspect pads regularly and replace at about 1/16 inch of material.
- Riding style and pad type strongly affect pad lifespan.
- Use proper pads and timely service to keep braking safe and reliable.
How Often Should I Replace Motorcycle Brake Pads?
I recommend checking brake pads often and replacing them when wear reaches safety limits. Replacement timing depends on mileage, riding style, and pad type.
Recommended Replacement Intervals
I typically tell riders to inspect pads every 2,500 miles (4,000 km). Most pads last between 5,000 and 20,000 miles (8,000–32,000 km) under normal riding conditions. Organic and sintered pads wear at different rates; sintered pads usually last longer.
Use a simple rule: replace when friction material is less than 1/16 inch (about 1.5 mm). If you ride in heavy traffic or aggressive braking, expect near the low end of the range. For light touring or highway use, expect near the high end.
I also recommend keeping a maintenance log with date, mileage, and pad thickness. That helps predict when the next replacement will be needed.
Factors Affecting Replacement Frequency
Pad material matters: organic pads wear faster than sintered and ceramic. My riding style matters too — hard stops, track days, and mountainous routes shorten pad life. City commuting with constant braking wears pads quicker than long highway rides.
Bike weight and brake system design affect wear. Heavier bikes and strong calipers increase pad demand. Weather and road grit accelerate wear; salty or sandy roads grind pads faster.
Maintenance also changes lifespan. I bleed brakes, clean calipers, and keep rotors true. Those steps reduce uneven wear and can extend pad life by thousands of miles.
Warning Signs of Worn Brake Pads
I watch for a few clear signs: a high-pitched squeal or grinding noise when braking, reduced stopping power, or a brake lever that feels spongy or travels more than usual. These indicate pads or fluid issues.
I perform a visual check: if the grooves on the pad surface are gone or the pad thickness is under 1/16 inch, I replace them immediately. Also check for metal-to-metal contact or brake warning lights.
If I notice vibration, uneven pad wear, or a sudden change in performance, I stop riding and inspect the brakes. Those symptoms can point to caliper or rotor problems that affect pad life.
Inspecting Motorcycle Brake Pads
I check brake pads regularly because small differences in pad thickness or surface condition tell me when to service them. Focus on pad thickness and visible wear patterns; these two checks reveal most problems.
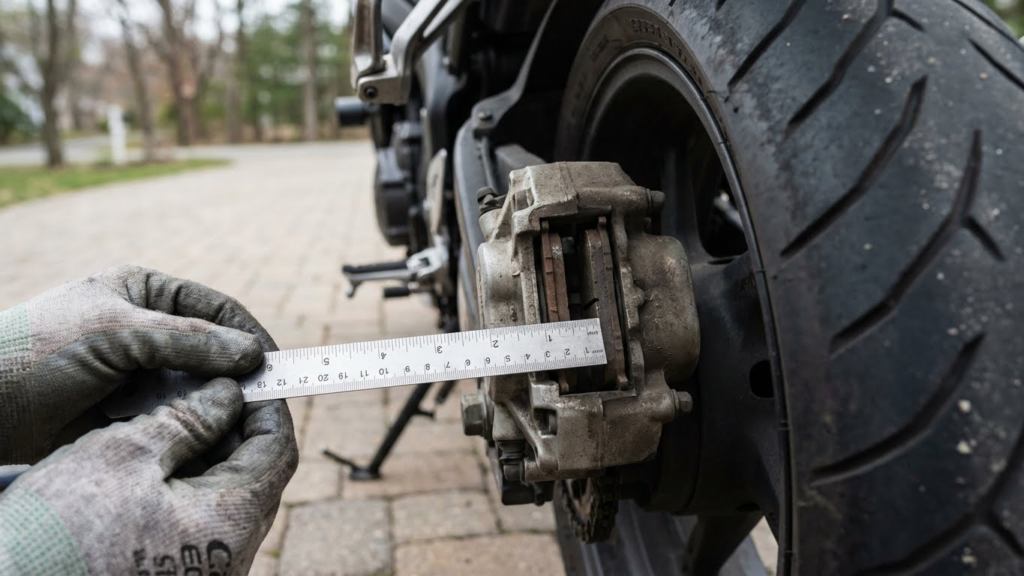
How to Check Brake Pad Thickness
I start by locating the pad through the caliper opening. With the wheel still on the bike I use a flashlight and a ruler or caliper to measure the friction material, not the metal backing plate. Replace pads when material is 2 mm (about 1/16 inch) or less.
If measurement is hard, remove the wheel or caliper for a clear view. On many bikes wear indicators or stamped lines show the minimum thickness. I also pump the brake lever a few times before measuring to seat the pads and get an accurate reading.
For guidance on spec ranges for specific models I check the factory service manual or reputable sources like the Motorcycle Safety Foundation and manufacturer pages for torque and clearance specs.
Visual Signs of Brake Pad Wear
I inspect the pad surface for glazing, contamination, and uneven wear. Glazing looks shiny and smooth and reduces bite; contamination from oil or grease can cause squeal and reduced stopping power.
I check the pad backing plate for rust or cracks and the pistons for uneven retraction, which can cause one pad to wear faster. If I see metal-to-metal contact—scoring or a very thin pad—I stop riding and replace the pads immediately.
I also look for brake dust buildup and listen while braking. Squealing or grinding noises often point to worn pads or embedded debris that needs cleaning or pad replacement.
Different Types of Motorcycle Brake Pads
I compare pad materials by feel, wear rate, stopping power, and noise. I focus on what riders notice day to day: bite, dust, rotor wear, and how often you’ll need to replace them.
Organic Brake Pads
I prefer organic pads when I want quiet braking and gentle rotor treatment. They use woven fibers, rubber, and resins, so they give smooth initial bite and low noise. That makes them good for street bikes and mellow riding.
Organic pads wear faster than other types. I expect higher dust and shorter life—often several thousand to around 10,000 miles depending on riding style. They also fade under heavy heat, so they’re not ideal for track days or heavy mountain use.
If you ride mostly in town or commute, organic pads can be the best balance of comfort and cost. I check thickness every few thousand miles and swap them sooner if I feel reduced bite or hear squeal.
Sintered Brake Pads
I use sintered pads when I need strong, repeatable braking in tough conditions. They are made by fusing metallic particles under heat and pressure, giving high friction and excellent heat resistance. That translates to firmer, more consistent stopping at high loads.
Sintered pads last longer than organic pads—often 10,000–30,000 miles—especially under hard braking or wet, gritty conditions. They produce more dust and can cause faster rotor wear, so I monitor rotors and clean rims more often.
I pick sintered pads for dual-sport, adventure bikes, and heavy sport use. They shine in rain and off-road mud, where mechanical grip and durability matter more than quietness.
Ceramic Brake Pads
I choose ceramic pads when I want low dust, stable feel, and long life for street riding. Ceramic formulations combine ceramic fibers and fillers to offer consistent friction, low noise, and minimal rotor wear. They also stay stable across normal street temperatures.
Ceramic pads last longer than organics and rival sintered pads in life span under light to moderate use. They produce the least dust and keep wheels cleaner, which I appreciate for daily riders and touring. Bite can be slightly less aggressive than sintered types at very high temperatures.
I use ceramics on sport-touring or commuter bikes where comfort and low maintenance matter. I still inspect them regularly, since extreme track use can push them beyond their intended range.
Riding Habits and Their Impact on Brake Pad Life
I focus on the real riding choices that wear pads fastest. Small changes in speed, braking style, or load can cut pad life by thousands of miles.
Urban vs. Highway Riding
City riding wears pads much faster than highway miles. Frequent stops, traffic lights, and tight turns force constant braking. Each stop converts kinetic energy to heat and friction that removes pad material.
Highway riding is gentler on pads when you keep steady speeds. Long cruising at 60–75 mph uses the engine and transmission more than the brakes. You still need brakes for slower traffic and exits, but those events are fewer and less intense.
If you do a lot of inner-city commuting, expect pad life to be measured in a few thousand miles. If most of my miles are highway, pads often last far longer.
Aggressive Braking
Hard, late braking creates sudden, high-temperature wear. I find that repeated panic stops or riding the throttle to the last moment grinds pads quickly. Heat buildup also reduces pad effectiveness and can cause glazing.
Smooth, progressive braking spreads wear more evenly. I brake earlier, bleed off speed, and use engine braking when safe. Small changes—like easing off the throttle sooner—can noticeably extend pad life without changing travel time much.
Passenger and Cargo Loads
Adding a passenger or heavy luggage increases the force needed to stop. Extra mass means more kinetic energy at any given speed, so the brakes work harder and pads wear faster.
I adjust my braking distance and avoid aggressive stops when carrying weight. Regularly carrying a pillion or heavy gear means checking pads more often and planning for replacements sooner than solo-riding schedules suggest.
Consequences of Not Replacing Brake Pads on Time
Failing to replace pads when they are thin raises two main risks: brakes that take longer to stop and rotors that get ruined. Both increase repair costs and raise the chance of an accident.
Reduced Stopping Power
I notice shorter pad material first, and that directly cuts braking force. Thin pads have less friction surface, so the same lever pull produces less braking torque. This means my bike needs more distance to stop, especially in wet or emergency situations.
Worn pads also heat up faster. Excess heat causes uneven braking and fade — where the brakes feel weak after repeated use. That makes highway braking and hard stops much less predictable.
Watch for a spongy lever, louder squeal, or the need to pull the lever farther than usual. Those signs tell me to inspect pads immediately. For more detail on safe stopping distances and testing, I refer to resources like the Motorcycle Safety Foundation (https://www.msf-usa.org).
Potential Damage to Brake Rotors
If I keep riding with worn pads, the metal backing plate can contact the rotor. That contact scores grooves into the rotor surface and can warp the rotor from heat. Once the rotor is scored or warped, simple pad replacement usually won’t restore smooth braking.
Damaged rotors force me to either resurface them (if within spec) or replace them entirely. Rotor replacement costs far more than pads and takes more labor time. I check rotor thickness and surface condition whenever I change pads to avoid bigger bills.
For rotor wear limits and measurement tips, I consult manufacturer specs or trusted tech guides such as those from motorcycle OEMs or shop manuals (for example, official service manuals or SAE guidance).
Best Practices for Extending Brake Pad Life
I focus on techniques and maintenance steps that cut pad wear and keep stopping power high. Small changes in how I ride and how I care for the bike add up to longer pad life and safer braking.
Proper Braking Techniques
I avoid riding the brakes and use engine braking when possible. I downshift smoothly on long descents and apply the front and rear brakes in a controlled, progressive way rather than grabbing a single lever hard.
I brake earlier to reduce emergency stops. That lowers heat and friction on the pads. Short, repeated stops wear pads faster than steady, full stops, so I aim for one firm squeeze instead of many light taps.
I modulate the front brake to control speed, then add the rear to stabilize. In wet or sandy conditions I reduce braking force and increase following distance to prevent sliding and glazing of the pads.
I also keep an eye on load changes. When carrying a passenger or luggage I brake earlier and more gently to avoid overheating the pads.
Regular Motorcycle Maintenance
I inspect pads every 3,000–5,000 miles and whenever I change tires or ride in heavy traffic. I measure pad thickness and replace them before the friction material reaches the manufacturer’s minimum spec.
I clean calipers and pistons during inspections. Dirt and brake dust cause uneven wear, so I use brake-cleaner and a soft brush to remove buildup. I also check for stuck caliper pins and lubricate sliding parts with the correct high-temp grease.
I bleed brake lines at least once a year or when I feel a spongy lever. Fresh fluid and correct hydraulic pressure prevent excess pad contact and heat. I keep rotor surfaces smooth and free of warps by checking runout and replacing warped rotors promptly.
Choosing the Right Replacement Brake Pads
I pick pads based on riding style first. For city or sport riding I choose sintered or semi-metallic pads because they stop well and last longer under heavy use. For light touring or casual riders I often prefer organic pads for quieter, gentler feel.
Consider the pad’s heat performance and wear rate. Sintered pads work well when brakes get hot, but they can wear rotors faster. Organic pads are kinder to rotors but fade sooner under hard braking.
Match pads to your bike and rotor type. Use the manufacturer’s part number when possible. If I can’t find that, I check fit, thickness, and backing plate shape before buying.
Look at braking feel, longevity, and cost together. I balance grip and lifespan against price—higher-performance pads cost more but can be safer for aggressive riding. For mixed riding, semi-metallic often gives the best compromise.
Quick checklist:
- Riding style: city, touring, sport
- Pad material: sintered, semi-metallic, organic
- Fit: correct part number or exact fit dimensions
- Rotor compatibility: avoid pads that overheat or wear rotors excessively
When in doubt, I consult a trusted mechanic or the bike’s service manual to confirm the right choice.
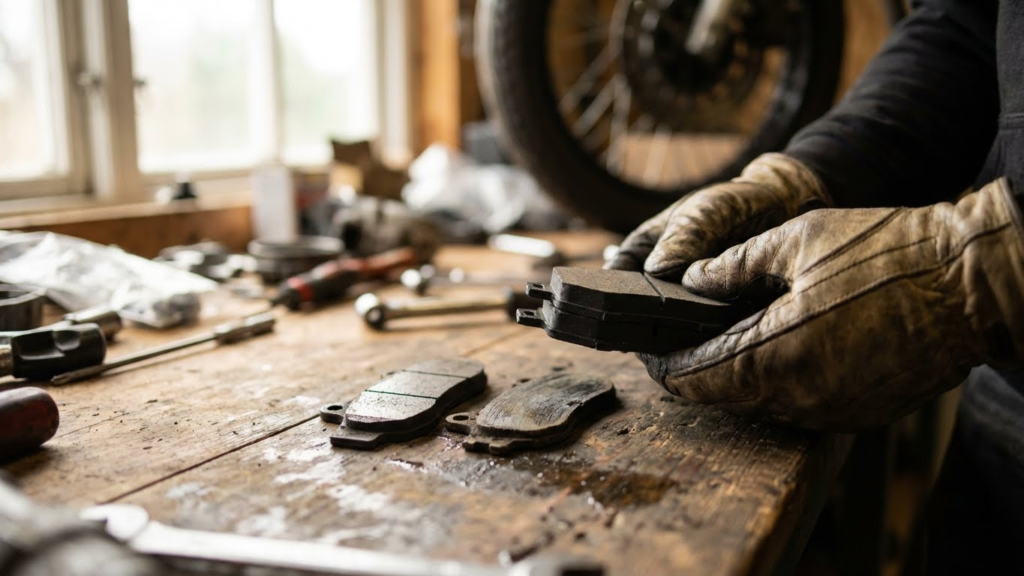
Professional vs. DIY Brake Pad Replacement
I can save money and learn a lot by doing my own brake pad replacement. DIY works well if I have the right tools, a clean workspace, and clear instructions. I must also be comfortable handling brake fluid, calipers, and torque specs.
I choose a professional when I want a full safety check and fast, reliable service. Shops inspect rotors, calipers, brake lines, and ABS components. They also test the system and usually offer a warranty on parts and labor.
Pros and cons list:
- DIY: Lower cost, hands-on learning, control over parts.
- DIY risks: Mistakes can harm safety, require special tools, and take extra time.
- Professional: Expert installation, full inspection, warranty.
- Professional downsides: Higher cost and less personal control.
I recommend DIY only if I have experience or follow a trusted guide step-by-step. If I’m unsure about any step, I’ll choose a pro to avoid safety risks. When I do it myself, I always double-check torque values, bed-in new pads correctly, and test brakes at low speed before normal riding.
FAQs
What are the clear signs pads need replacing?
If you hear squealing, grinding, or feel reduced stopping power, replace them right away. Visual checks matter: less than 1/16 inch (about 1.5 mm) of friction material means immediate replacement.
How many miles do pads last?
Pads can last from 5,000 to 20,000+ miles. I say expect 5,000–15,000 miles in mixed conditions and up to 20,000 or more with light use and high-quality pads.
Can I ride until the brake warning light comes on?
No. Don’t wait for a warning light. I treat lights as a last-resort alert and prefer regular inspections to catch wear early.
Should I replace front and rear pads together?
Not always. I replace pads as they wear. Front pads usually wear faster, but if both are thin, replace both for balanced braking.
Do different pad materials change replacement frequency?
Yes. Organic pads wear faster; sintered or ceramic pads last longer. I pick material based on my riding needs: street, sport, or heavy-load touring.
Can I check pads myself?
Yes. I inspect pads at the caliper or through wheel openings. If unsure, I get a mechanic to measure thickness and check for uneven wear.
Conclusion
I recommend checking your brake pads regularly and replacing them when the friction material gets thin or when performance drops. I watch for noises, a spongy lever, or reduced stopping power as clear signs to act.
I aim for inspections every few thousand miles and expect pads to last roughly 5,000–20,000 miles depending on riding style and pad type. Aggressive riding, heavy loads, or wet conditions shorten pad life.
If I see pad thickness under about 1.5–2 mm (or less than 1/16 inch), I replace them immediately. I also replace pads in pairs for balanced braking and safer handling.
I keep a simple checklist to stay on top of this:
- Visual pad thickness check
- Listen for squeal or grinding
- Test lever feel and stopping distance
- Replace pads in pairs when worn
I prefer using manufacturer-recommended pads and torque specs to avoid fitment or performance issues. When in doubt, I consult a mechanic or service manual to confirm timing and procedure.