
You want your motorcycle to run smooth, safe, and ready whenever you ride. Keep a simple routine of checks, basic care, and timely repairs to prevent small issues from turning into big problems. Do regular inspections, use the right fluids and parts, and fix anything that feels or sounds wrong to keep your bike running smoothly.
I’ll show practical, easy steps you can follow at home and when to call a pro, so you save time and avoid breakdowns. You’ll learn quick checks for tires, brakes, battery, fluids, and the drive system that keep your bike dependable all year.
Key Takeaways
- Inspect key systems often to catch problems early.
- Use correct fluids and quality parts for consistent performance.
- Store and care for your bike to prevent wear and corrosion.
Regular Motorcycle Maintenance
I keep my bike reliable by following set service intervals, doing quick inspections before and after rides, and tracking every task and part. These steps catch small issues early and prevent breakdowns.
Scheduled Service Intervals
I follow the manufacturer’s service schedule in the owner’s manual as my baseline. Typical items include oil and oil filter changes every 3,000–6,000 miles (or yearly), valve clearances checked at the intervals listed in the manual, and coolant and brake fluid replaced every 2 years or as specified.
I also watch timing belt or chain service intervals; chains need regular adjustment and lubrication every 300–600 miles, while belts usually require replacement per the manual. Tire replacement follows tread depth and age limits—replace tires with less than 2/32″ tread or any visible dry rot. When in doubt, I schedule a dealer or trusted mechanic service at the listed mileages.
Inspection Routines
I use a short pre-ride and a fuller monthly checklist. Pre-ride checks take 2–3 minutes: tire pressure and visual tread, brake lever feel, lights and signals, oil level, and throttle action. These stop most immediate problems before I leave.
Monthly I inspect chain tension and lube, brake pad thickness, fluid levels, battery terminals, and steering head play. I look for leaks at the engine and fork seals, and for loose fasteners. I use a simple checklist and a small torque wrench for critical bolts. If I find anything uncertain, I stop riding and consult a mechanic.
Keeping Records of Maintenance
I keep a dedicated log—paper or digital—with date, mileage, work done, part numbers, and cost. This includes oil changes, tire purchases, brake pad changes, chain replacements, and any professional service.
I also store receipts and photos of condition before and after major jobs. That record helps me spot recurring issues, plan the next service, and maintain resale value. When I take the bike to a shop, I add their summary to the log and note the next recommended service mileage.
Engine Care Essentials
I focus on the parts that wear fastest and affect performance most: oil, coolant, and ignition. Regular checks, timely replacements, and simple inspections keep the engine reliable and efficient.
Oil Change and Filter Replacement
I change my oil on the schedule the owner’s manual gives, or sooner if I ride hard, tow, or do many short trips. Warm the engine, then drain the oil completely and replace the oil filter. I use the exact oil grade the manufacturer specifies; the wrong viscosity changes oil pressure and wear.
When I refill, I check the level with the dipstick or sight glass and avoid overfilling. I torque the drain plug to spec and replace crush washers if required. I dispose of used oil and filters at a recycling center — many auto parts stores accept them. For more on oil specs and intervals, I reference the motorcycle manual and trusted sources like the Motorcycle Safety Foundation.
Coolant Level Checks
I check coolant when the engine is cold. I open the reservoir cap only when cool and inspect level and color. Proper coolant prevents overheating and corrosion; low level or rusty coolant needs attention.
I follow the coolant type and mix ratio the manufacturer calls for — using the wrong coolant can damage hoses and the radiator. If level drops repeatedly, I check hoses, clamps, and the water pump for leaks. I flush and replace coolant on the interval in my owner’s manual and consult the service manual for correct bleeding procedure to remove air pockets.
Spark Plug Inspection
I remove and inspect spark plugs at the intervals listed in the manual or if the bike runs rough. I look for electrode wear, heavy carbon, oil fouling, or glazed insulators. The plug gap must match spec; incorrect gap causes misfires and poor fuel economy.
I replace plugs with the exact type and heat range recommended. I clean threads and apply anti-seize sparingly if the manual allows, then torque plugs to the specified value. If I find consistent fouling or unusual deposits, I diagnose fuel mixture, valve seal, or ignition coil issues rather than just replacing plugs. For detailed gap and torque specs, I consult the service manual or resources like manufacturer tech pages.
Fuel System Maintenance
I check the fuel system regularly to prevent clogs, poor idle, and loss of power. I focus on the fuel filter and the fuel delivery parts—clean, replace, and inspect them on a schedule.
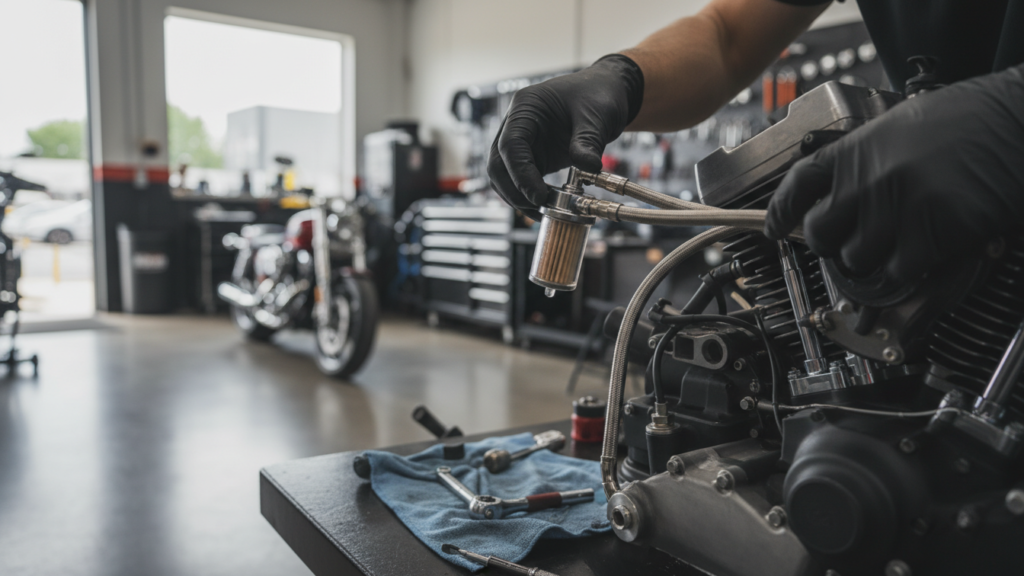
Fuel Filter Cleaning
I locate the fuel filter between the tank and the carburetor or injectors. For inline filters I usually remove the hose clamps, pull the filter out, and shake or flush it with clean gasoline or a low-pressure solvent if it’s a reusable type.
If the filter is paper or visibly dirty, I replace it. I follow the motorcycle maker’s interval—often every 12,000–24,000 miles or sooner if I see debris or fuel flow issues. I always check rubber hoses and clamps while the filter is out and replace cracked hoses.
When reinstalling, I ensure correct flow direction, tighten clamps to avoid leaks, and run the bike to confirm steady fuel flow. I keep a spare filter and basic tools in my kit to fix problems quickly on the road.
Carburetor and Injector Care
For carbureted bikes I remove and clean jets, float bowls, and passages with a carb cleaner and compressed air. I inspect the float level and needle valve, replace worn gaskets, and reassemble carefully to the factory specs. Small debris or varnish from old fuel causes rough idle and poor throttle response, so I do this more often if the bike sits unused.
For fuel-injected bikes I use a fuel injector cleaner added to the tank per product directions or have a shop perform a pressurized cleaning for stubborn deposits. I check the fuel pressure with a gauge and compare it to the service manual. I also inspect wiring and connectors at the injectors for corrosion.
In both systems I use fresh, stabilized fuel if the bike will sit more than a month. I keep a maintenance log of cleanings, replacements, and any fuel-related performance notes.
Battery Health Management
I keep the battery charged, clean, and tightly connected so my bike starts reliably and electrical systems work properly. Routine checks and the right charger reduce failures and extend battery life.
Battery Charging Practices
I use a smart, motorcycle-specific charger or a quality maintainer that offers automatic float charging. I avoid cheap trickle chargers that can overcharge; instead I choose chargers with multi-stage charging and temperature compensation. For lead-acid or AGM batteries I set the charger to the correct voltage (usually 13.6–13.8V float). For lithium batteries I confirm the charger has a lithium mode and matches the battery’s voltage and cell balance needs.
I charge after any long ride where the charging system may not have fully replenished the battery. If I store the bike for more than two weeks, I connect a maintainer to prevent deep discharge. I check charge state with a multimeter (resting voltage above ~12.6V for lead-acid) and use a hydrometer for serviceable cells when needed.
Terminal Cleaning and Connection Checks
I inspect terminals and cable ends every month for corrosion, loose nuts, or frayed wires. I remove corrosion with a wire brush and a paste of baking soda and water, then rinse with clean water and dry thoroughly. I apply a thin coat of dielectric grease or terminal protector to slow re-corrosion.
I tighten connections to the manufacturer’s torque spec or until snug; avoid over-tightening which can strip threads. I check ground straps and engine-to-frame connections as a weak ground shows as dim lights, slow cranking, or erratic gauges. If terminals are badly pitted, I replace the terminals or battery posts to restore a low-resistance connection.
Transmission and Drive System Upkeep
I focus on the parts that move power from the engine to the wheel and keep them clean, tight, and lubricated. Regular checks prevent slipping, uneven wear, and costly repairs.
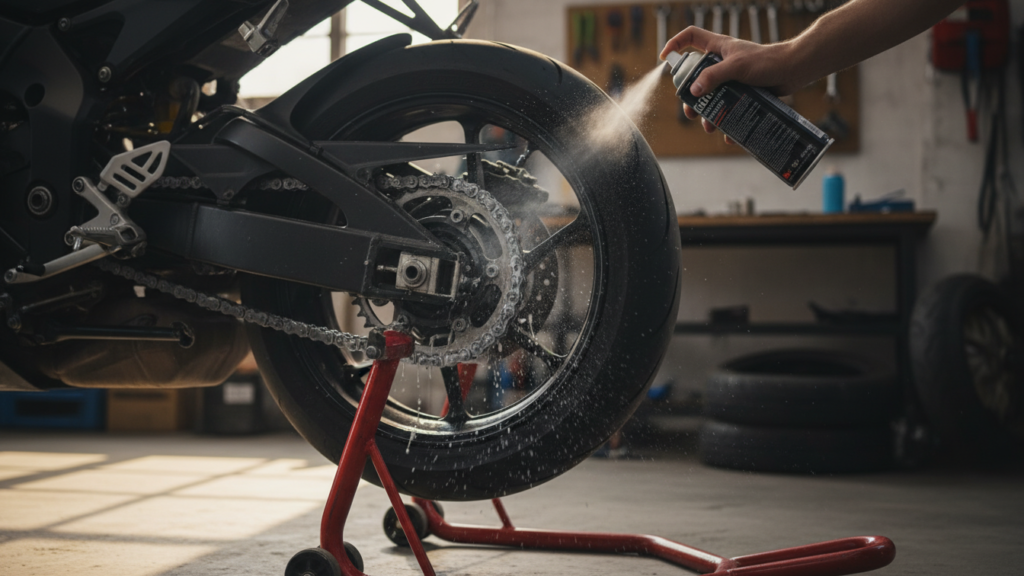
Chain Lubrication and Adjustment
I inspect chain slack every 500–800 miles, or more often if I ride in rain or dirt. I measure slack at the midpoint between sprockets and follow the motorcycle manual for the exact range, usually 20–40 mm. If slack is out of range, I loosen the axle, adjust the tensioners evenly on both sides, and recheck alignment using the marked chain adjuster or a straightedge.
I clean the chain with a non-corrosive brush and a chain cleaner or kerosene, then let it dry. I apply chain lube to the inside of the chain while rotating the wheel, aiming for even coverage on rollers and O-rings. I wipe excess lube to avoid fling onto the rear wheel and brake. I replace chains or sprockets when teeth are hooked, rollers bind, or stretch exceeds service limits.
Clutch and Gearbox Inspection
I check clutch function every few thousand miles and after heavy use. If I feel slipping under load, a soft engagement, or unusual noise, I first confirm cable or hydraulic free play matches spec. For cable clutches I adjust the free play at the lever and the adjuster near the engine; for hydraulic systems I check fluid level and look for leaks or spongy feel that signals air or worn components.
I inspect gearbox oil at recommended intervals and use the grade the manual specifies. Low or dirty oil causes hard shifting, grinding, and accelerated wear. When I change oil I also check the drain plug for metal filings that indicate internal damage. If gear selection becomes rough or I hear abnormal gears grinding, I stop riding and have the gearbox checked to avoid further damage.
Brake System Safety
I check my brakes regularly and act on wear or fluid issues right away. Proper pad condition, disc wear, and fresh brake fluid keep stopping consistent and prevent failures.
Brake Pad and Disc Examination
I inspect pads every 1,000–2,000 miles or after any hard stop. Look for pad thickness — replace when lining is at or below 2–3 mm. Uneven wear, glazing (shiny surface), or cracks mean replace now. Also check disc rotors for deep grooves, warping, or a lip at the edge. Measure rotor thickness with a caliper and compare to the spec in my service manual. If the rotor is below spec or has runout (wobble) over 0.05–0.1 mm, I replace or have a shop resurface it.
I test braking feel during short rides. Pulsing, noise, or reduced bite point to pad or rotor trouble. For guidance on pad types and rotor limits, I use my motorcycle’s manual and resources like the Motorcycle Safety Foundation or manufacturer service pages.
Brake Fluid Replacement
I change hydraulic fluid on a strict schedule because fluid absorbs water and loses boiling point. For DOT 4 fluid I replace every 1–2 years; DOT 5.1 follows manufacturer advice. If the fluid looks dark or cloudy, I flush immediately. I bleed brakes to remove air after replacing fluid or any caliper work. Use a clean reservoir cap and fresh, sealed fluid from the container to avoid contamination.
When I bleed, I follow the correct sequence (usually caliper farthest from master cylinder first). I watch fluid color, check for leaks at lines and banjo bolts, and torque fittings to spec. For DOT ratings and safe handling, I reference official sources like the SAE and my bike maker’s service documentation.
Tire and Wheel Inspection
I check tire pressure, tread depth, and wheel condition every time before longer rides. Proper inflation, good tread, and damage-free rims keep handling predictable and reduce the chance of a failure.
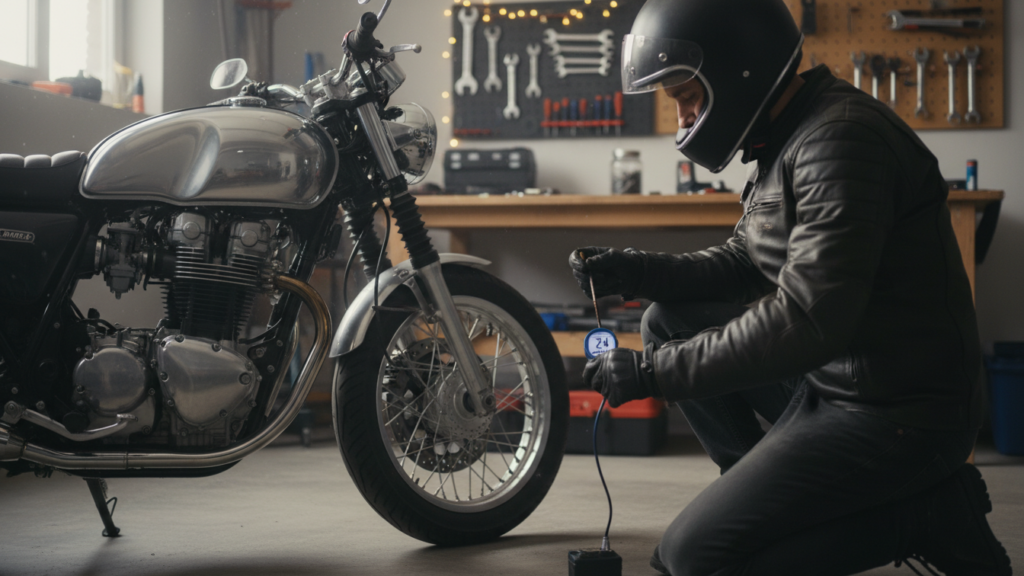
Tire Pressure Monitoring
I use a quality gauge to check pressure when tires are cold — before I ride or after the bike has sat for at least three hours. I set pressure to the exact values in the owner’s manual or on the swingarm sticker; if I ride with a passenger or luggage I increase rear pressure by the amount the manual suggests.
I inspect both tires visually for bulges, cuts, or objects stuck in the tread. If pressure drops more than a few psi in 24 hours, I look for a slow leak or valve-stem damage. I also check the spare (if I carry one) and the pressure gauge battery if it’s digital.
Tread Depth Measurement
I measure tread depth across the center and both shoulders with a simple tread depth gauge or a coin when a gauge isn’t available. I replace tires if center tread is below the manufacturer’s minimum or if wear is uneven across the width.
I look for the wear indicators molded into the grooves; when the tread level reaches them, I plan a replacement. I also check for flat spots, cupping, or cords showing through — any of these mean the tire is unsafe and needs replacing regardless of depth readings.
Suspension and Steering Performance
I focus on keeping forks, shocks, and the steering head in good shape so the bike handles predictably and tracks straight. Small checks and timely fluid or part changes prevent big handling problems and keep rides safer.
Fork Oil and Seal Checks
I check fork oil every 12,000 miles or sooner if the ride feels harsh or the forks stick. I drain and replace the oil following the manual’s specified weight and volume. Fresh oil restores damping and compression control, so the bike absorbs bumps correctly.
I inspect fork seals for oil streaks on the tubes and soft dust wiper rings. If I see leaks or pitting on the stanchions, I replace seals and polish or replace the tubes. I also compress the forks while watching for dragging or hesitation — that tells me the internals may need service.
Tools and parts I commonly use: socket set, seal driver, new fork oil (weight per manual), replacement seals, and a torque wrench. I keep records of oil type and change date for consistent maintenance.
Steering Head Bearing Adjustment
I check the steering head for play by lifting the front wheel and moving the handlebars back and forth. If I feel a notchiness or side-to-side movement, the bearings need inspection or adjustment. I loosen the top clamp, preload the bearings until there’s no play, then tighten the clamp to the specified torque.
If the steering feels rough when I turn, I remove the triple clamps and clean the bearings and races. I replace bearings that show pitting, rust, or rough rotation. I pack new bearings with grease rated for bearings and reassemble using the factory torque and preload specs.
I retest on the stand and on a short ride to confirm smooth, centered steering without drift. Proper adjustment keeps tire wear even and improves rider confidence.
Electrical System Reliability
I focus on the battery, charging, lights, and wiring to prevent failures. Quick checks and timely repairs keep starts reliable and lights bright.
Lighting and Indicator Assessment
I check headlight, taillight, brake light, and turn signals before every ride. I confirm high and low beams work and aim the headlight so it lights the road, not the sky.
I test brake and tail lights by applying the brake and watching a helper or a wall reflection. I replace bulbs with the exact type listed in the manual or swap to LED units specified for my model to avoid overload.
I inspect indicator housings and lenses for cracks that let moisture inside. If a signal flashes fast, I measure bulb resistance or check the flasher relay; a fast flash often means a burned-out bulb or wrong bulb type.
I keep a small spare bulb and a compact multimeter in my kit. That lets me fix common lamp faults roadside and verify voltage at the connector quickly.
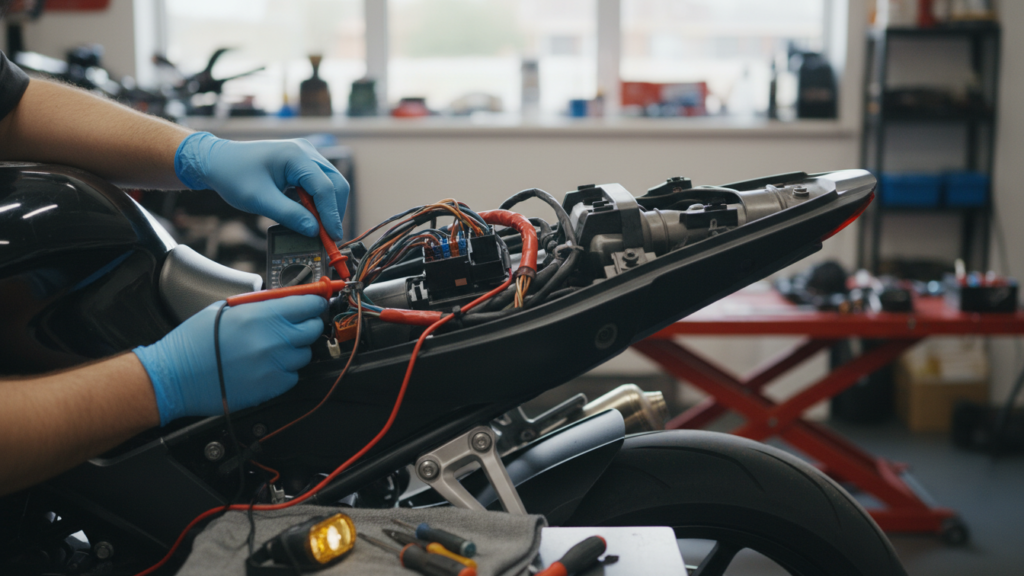
Wiring and Fuse Inspection
I trace visible wiring along the frame and under the seat every month. I look for frays, chafing, melted insulation, and tight bends where wires rub against metal.
I check connectors for corrosion, loose pins, or missing seals. I clean mildly corroded terminals with contact cleaner and a small brush, then apply dielectric grease to prevent future corrosion.
I inspect the fuse box and match each fuse to the amperage stamped on the cover. I replace blown fuses with the same type and rating only, never bypass a fuse or use higher-rated fuses.
I secure loose wiring with zip ties and reroute cables away from hot pipes and sharp edges. If I find damaged wiring that exposes copper, I replace that section or splice with quality heat-shrink butt connectors and solder for a reliable repair.
Cleanliness and Corrosion Prevention
I keep the bike clean and stop rust before it starts. Regular washing, careful drying, and targeted corrosion protection protect paint, metal, and moving parts.
Regular Washing and Detailing
I wash my motorcycle after salty, rainy, or dusty rides to remove grime that wears paint and metal. I rinse thoroughly with low-pressure water, then use a motorcycle-safe shampoo and a soft sponge to clean bodywork and hard-to-reach areas like under-fairings and around fasteners.
I clean the chain separately with a chain brush and a dedicated degreaser, then dry it and apply the right chain lube. I wipe brake calipers, rotors, and electrical connectors with a clean, dry cloth—never spray pressurized water directly into electrical parts.
After washing, I dry the bike with microfiber towels and use compressed air or a leaf blower to push water from seams and behind trim. I finish with a light coat of motorcycle wax or paint sealant to add a moisture barrier.
Rust Protection Methods
I inspect fasteners, frame joints, and exhaust headers for surface rust every few weeks. For new surface rust, I use a nylon brush or fine steel wool and a rust remover, then neutralize and clean the area before applying a primer or rust-inhibiting paint.
I apply corrosion-resistant sprays to the frame, kickstand pivot, and exposed bolts. I avoid over-spraying brakes and sensors by masking those areas first. For long-term storage I coat chrome and bare metal with a thin layer of oil or wax and keep the bike on a solid cover in a dry space.
I replace heavily corroded bolts and use stainless or zinc-plated fasteners where practical. Regular small repairs and preventive sprays save me time and keep the motorcycle running smoothly.
Proper Storage and Seasonal Preparation
I focus on steps that protect the engine, fuel system, battery, tires, and finish. Doing a few key tasks before storage and after storage prevents corrosion, fuel problems, and hard starts.
Long-Term Storage Techniques
I drain or stabilize the fuel. For storage under three months I add a quality fuel stabilizer, run the engine 10–15 minutes to circulate it, and top off the tank to limit air and condensation. For longer storage I recommend draining the carburetor or fuel-injection system following the owner’s manual.
I disconnect or maintain the battery. I use a smart maintainer or remove the battery and store it in a cool, dry place. That keeps voltage steady and prevents sulfation.
I lift or move the bike to protect tires and suspension. I either put it on a paddock stand or inflate tires to the correct pressure and rotate them occasionally to avoid flat spots.
I protect the finish and metal. I wash and wax the bike, apply a thin coat of corrosion inhibitor on exposed metal, and cover it with a breathable motorcycle cover in a dry, ventilated space.
Pre-Ride Inspection After Storage
I check the battery voltage and charge it fully if needed. I inspect all fluids—engine oil, coolant, brake and clutch fluid—and top or replace them if they look dark or low.
I look over the fuel system. I drain old fuel if it smells sour, replace the fuel filter, and check fuel lines for cracks or leaks. I crank the engine and listen for odd noises; rough idle can mean stale fuel or carburetor issues.
I test tires, brakes, lights, and controls. I set tire pressure to spec, verify brake pads and rotors, and make sure lights, horn, throttle, and clutch feel normal. I take a short low-speed ride to confirm brakes, steering, and engine response before full-speed riding.
Choosing Quality Parts and Fluids
I pick parts and fluids that match the motorcycle maker’s specifications. Using the wrong oil grade or cheap brake pads can cut performance and raise safety risks. I always check the owner’s manual first.
I prefer OEM or well-known aftermarket brands for critical items like brake pads, tires, and filters. These parts tend to fit better and last longer. For non-critical accessories, I may choose budget options.
For fluids, I use the exact type the manufacturer recommends: engine oil, coolant, brake fluid, and hydraulic clutch fluid if applicable. I look for correct viscosity and DOT ratings on brake fluid. Fresh, correct fluids protect components and keep systems working.
I keep a short checklist when buying: brand, spec/model number, compatibility, and expiry date for fluids. I also inspect seals and packaging for damage. If unsure, I consult a dealer or trusted mechanic.
I store spare fluids in a cool, dry place and label open containers with the date. Old or contaminated fluids can harm the engine and braking system. Proper storage helps me avoid mistakes and keeps my bike running smoothly.
Adopting Responsible Riding Habits
I ride with a checklist in my head before every trip. I scan tires, lights, fluid levels, and my controls quickly. These small checks catch problems early and keep the bike reliable.
I ride smoothly to protect the engine and drivetrain. I avoid sudden revs and harsh shifting, and I ease into acceleration and braking. This reduces wear on the chain, clutch, and brakes.
I choose proper speeds and keep a safe following distance. Slower reaction time causes more wear and higher repair risk. Riding defensively also lowers the chance of crashes that could damage the bike.
I use the right gear and keep it maintained. Clean, well-lubed chain and correct tire pressure improve handling and fuel economy. I also replace worn parts promptly rather than waiting for failure.
I plan rides to match weather and road conditions. Wet or cold roads demand gentler inputs and more attention. I avoid aggressive riding on unfamiliar surfaces to reduce stress on the machine.
Quick reference:
- Daily: lights, tires, fluids, controls.
- While riding: smooth throttle, gentle shifts, steady braking.
- Routine: chain care, tire pressure, timely part replacement.
I make these habits part of my routine so my motorcycle runs smoothly and lasts longer.
FAQs
I get asked a lot about basic upkeep. What checks should I do before every ride?
I do a quick T-CLOCS check: Tires, Controls, Lights, Oil, Chassis, and Stands. It only takes a few minutes and catches many simple problems.
How often should I change oil and filters?
I follow the owner’s manual first. For many bikes, oil changes range from 3,000–6,000 miles or once a year. I replace the oil filter when I change the oil.
What tire care do I recommend?
I check tire pressure and tread before each ride. I also inspect for cuts, bulges, or uneven wear and replace tires when tread is low or damage is present.
How do I keep the battery healthy?
I keep the battery charged, especially in winter. I clean terminals, check fluid if applicable, and use a maintainer if I store the bike for weeks.
When should I clean the chain and adjust tension?
I clean and lube the chain every 300–600 miles or after wet rides. I check and adjust tension to the spec in my manual and inspect sprockets for wear.
Quick reference table
| Task | Frequency |
|---|---|
| Pre-ride T-CLOCS | Every ride |
| Oil change | 3,000–6,000 mi / yearly |
| Chain service | 300–600 mi |
| Tire inspection | Every ride |
| Battery check | Monthly / before storage |
Conclusion
I focus on regular checks and simple care to keep my motorcycle running smoothly. Small habits, like a quick pre-ride inspection and timely oil changes, prevent bigger problems later.
I follow a basic schedule for fluids, filters, tires, and the chain or belt. Sticking to that schedule keeps performance steady and lowers repair costs.
I use high-quality parts and fluids that match my bike’s manual. That reduces wear and keeps systems working as designed.
When I spot something unusual — noises, leaks, or handling changes — I address it right away. Early fixes are cheaper and safer than waiting.
I keep a short maintenance log to track what I did and when. It helps me spot patterns and plan services.
If a job is beyond my tools or skill, I take the bike to a trusted mechanic. Professional help keeps complex systems reliable.
Key actions I take:
- Daily: quick visual and tire check
- Weekly: chain, controls, and fluid glance
- Every few months: detailed inspection and service items per the manual
These steady steps keep riding reliable, safer, and more enjoyable.