
You can check your motorcycle brake pads by visually inspecting the pad thickness through the caliper or by using the wear indicator; replace pads that are below about 2 mm or show uneven wear. If the pad material looks thin, cracked, or uneven, swap the pads before they ruin the rotor or reduce braking power.
I’ll walk you through the simple tools to use, how to safely expose the pads, what signs to look for, and when to call a pro so you don’t guess at a dangerous situation. Follow a few quick checks and you’ll know whether the pads are safe or need changing.
Key Takeaways
- Check pad thickness and surface condition to judge wear.
- Use basic tools and safe setup to inspect pads clearly.
- Replace pads at thin or uneven wear to keep brakes reliable.
Why Checking Motorcycle Brake Pads Matters
I check brake pads to spot wear, contamination, and uneven wear early. That helps keep stopping distance short, prevents damage to the rotor, and keeps me legal on the road.
Safety Considerations
I inspect pads because worn pads reduce stopping power and raise crash risk. If a pad thickness falls below about 2 mm, I treat it as an immediate replacement item. Thin pads can cause metal-on-metal contact, which can grab suddenly and throw the bike off balance.
I also look for glazing, cracks, or oil contamination. Contaminated pads feel spongy and lengthen stopping distance. I always test brakes at low speed after any service to confirm they bite predictably.
Impact on Brake Performance
Pad thickness directly affects braking force and modulation. I measure remaining friction material and compare it to the manufacturer spec. Uneven pad wear or a pulsating lever usually points to caliper or rotor issues, not just the pad.
I inspect the rotor for grooves or scoring caused by worn pads. Deep scoring reduces contact area and increases heat, which can fade brakes under heavy use. Replacing pads before they overheat preserves consistent lever feel and shorter stopping distances.
Legal Requirements
I check pads because some jurisdictions set minimum pad thickness or vehicle inspection standards. I keep records of replacements and show them if required at safety inspections or after an incident. Riding with dangerously thin pads can lead to fines or failed inspections.
I follow the bike maker’s service schedule to meet warranty and legal expectations. That usually means visual checks at each ride or full inspections at major service intervals.
Tools and Equipment Needed
I list the gear I use to inspect brake pads so you can check thickness, fit, and condition safely. The items below cover basic removal, measurement, and minor service tasks.
Essential Tools
- Socket set and wrenches: I use a 10–17 mm metric set for caliper bolts and axle nuts. A ratchet and at least one extension make access easier.
- Flat-head screwdriver or pry tool: I gently open caliper retaining clips and lever out pads when needed.
- Caliper or ruler: I measure pad friction thickness with a digital caliper or a steel rule. Replace pads when lining is under about 2 mm.
- Torque wrench: I tighten caliper bolts to manufacturer specs to avoid stripped threads or loose parts.
- Clean rags and brake cleaner: I remove dust and oil from caliper surfaces. Use a dedicated brake cleaner to avoid contaminating pads.
- Protective gloves and eye protection: Brake dust can contain metal; I always wear nitrile gloves and goggles.
I follow my motorcycle owner’s manual for specific bolt sizes and torque values. For general brake-system info I reference resources like the Motorcycle Safety Foundation and manufacturer guides.
Optional Tools for Advanced Inspection
- Brake pad spreader or C-clamp: I compress pistons when installing new pads. A purpose-made spreader reduces risk of piston damage.
- Brake fluid tester or testing strips: I check fluid contamination and moisture content. If fluid is dark or hygroscopic, plan a brake bleed.
- Dial indicator or runout gauge: I measure rotor wobble and lateral runout when I suspect warped discs.
- Micrometer and feeler gauges: I use these for precise pad thickness checks and to detect uneven wear between inner and outer pads.
- Service manual and caliper tool kit: A model-specific manual gives torque specs and disassembly steps. OEM caliper tools speed piston retraction on some bikes.
- Portable workstand and wheel chocks: I keep the bike stable and the wheel off the ground for safe inspection.
I consult the factory service manual or a trusted site like Haynes for model-specific procedures before using advanced tools.
Preparing Your Motorcycle for Inspection
I will make the bike easy to access, stable, and safe before I look at the pads, fluid, and discs. I check workspace, lighting, tools, and then secure the motorcycle so I can inspect without the bike moving.
Choosing a Safe Workspace
I pick a flat, hard surface like a garage floor or driveway to keep the bike steady. I avoid gravel, grass, or slopes that can let the stand sink or the bike roll. Good lighting is critical; I use a bright work light or a headlamp to see through the wheel spokes and into the caliper window.
I clear at least a 3–4 foot perimeter around the bike for tool placement and movement. I keep a small bucket or tray for bolts and a rag for brake fluid drips. I wear gloves and eye protection in case fluid sprays or debris falls.
I also ensure the area is well ventilated if I plan to run the engine or use solvents. Finally, I have the service manual or a model-specific diagram nearby for pad thickness specs and torque values.
Stabilizing the Motorcycle
I put the bike on its center stand if it has one; that gives the best stability for inspecting both wheels. If no center stand exists, I use a rear paddock stand for the back wheel or a front stand for the front wheel, rated for my bike’s weight.
I chock the wheels when working on either wheel to stop rolling. I set the transmission to first gear to add resistance against movement. For extra safety, I place a block under the frame or use a jack with soft pads to prevent frame damage.
Before I touch the caliper or remove any parts, I give the bike a firm push to confirm it won’t tip. I arrange tools within arm’s reach so I don’t need to step away and risk an unstable setup.
How to Locate Motorcycle Brake Pads
I will show exactly where the brake pads sit on most bikes and what to look for when you inspect them. Focus on the caliper, rotor, and any access slots or inspection windows.
Front Brake Pad Location
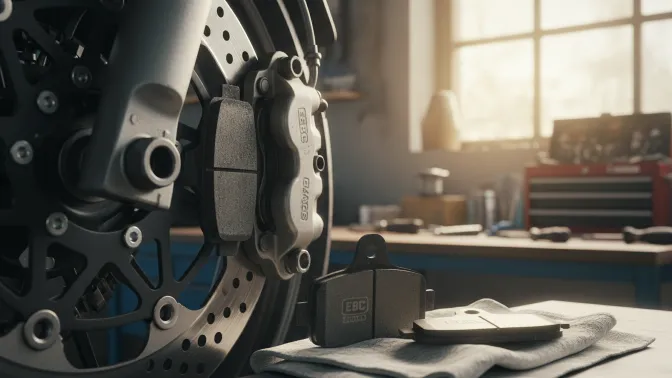
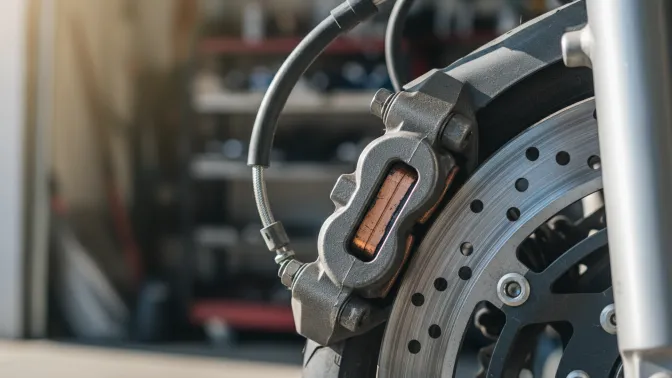
On most motorcycles the front brake pads live inside the front brake caliper mounted over the front rotor. I find the caliper on the fork leg(s) just behind the wheel. Look for two metal halves clamping the disc; the pads are the friction material inside those halves, pressed against the rotor.
Many calipers give you a clear view of pad thickness through an inspection hole or between the caliper body and rotor. If you can’t see them, remove the wheel or loosen the caliper to slide it out slightly. For model-specific steps and torque values consult the owner’s manual or a trusted source like the Motorcycle Safety Foundation or your bike maker’s service guide.
Rear Brake Pad Location
The rear brake pads sit inside the rear caliper, which mounts near the rear wheel and rotor or inside a drum on older bikes. I locate the rear caliper on the swingarm or near the chain/belt side and follow the brake line back from the master cylinder to find it.
If your bike uses a disc, the pads are visible like the front pads; look for wear through an inspection slot or behind the caliper arm. For drum brakes, check the backing plate and remove the drum to inspect shoe thickness. When in doubt, check your specific model’s service section on the manufacturer site or a repair manual for safe removal and reinstallation steps.
Visual Inspection of Brake Pads
I look closely at pad thickness, wear patterns, and any signs of fluid or debris on the pads. I use a torch and, if needed, remove the wheel or peek through the caliper to get a clear view.
Checking Pad Thickness
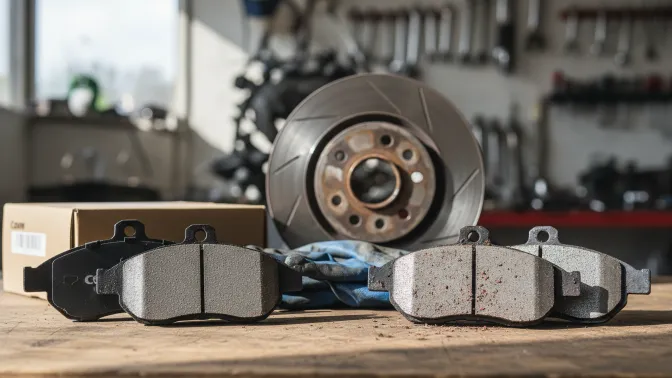
I measure pad thickness at the thinnest visible point of the friction material. New pads are usually 8–12 mm thick; I plan to replace them when the material is at or below about 2 mm (roughly 1/16 inch). If the pad has a built-in wear indicator slot or groove, I replace the pad once that groove is nearly gone.
I check both sides of the caliper because inner and outer pads can wear differently. If I can’t see the pad clearly, I remove the caliper or wheel following the service manual steps so I don’t damage components.
Tools I use: flashlight, ruler or caliper, gloves. I avoid riding when pads are near the minimum thickness.
Identifying Uneven Wear
I compare the inner pad’s thickness to the outer pad’s thickness for each wheel. If one pad is noticeably thinner, I suspect a sticking caliper piston, seized slide pins, or misaligned caliper mount.
I also look for tapering across the pad surface, which indicates rotor misalignment or warped rotor contact. If wear is uneven, I clean and lubricate slide pins, inspect pistons for free movement, and measure rotor runout. I replace pads and correct the mechanical issue before riding aggressively.
Spotting Contamination or Damage
I scan pad surfaces for oil, brake fluid, grease, or embedded metal shards. Contamination reduces friction and causes longer stopping distances. If I see dark glazing, shiny patches, or soft, crumbly material, I replace the pads.
I inspect the rotor surface where it meets the pad for scoring, rust, or blue discoloration from overheating. I avoid using contaminated pads; I clean the caliper and rotor with brake cleaner, then fit new pads. If rotors are badly scored or warped, I replace or resurface them per the manufacturer’s guidance.
When to Replace Your Brake Pads
I focus on two main checks: measuring pad thickness against safety limits, and watching for clear warning signs that mean immediate replacement. Both tell me when pads are no longer safe.
Minimum Thickness Guidelines
I measure the friction material, not the metal backing plate. Most manufacturers and mechanics say replace pads when the material is 1/16 inch (about 1.5–2 mm) or thinner. I keep a ruler or caliper in my tool kit to get an accurate reading through the caliper opening.
If a pad reaches the minimum thickness, I replace it right away. Riding on thin pads risks metal-on-rotor contact and costly damage. For heavy riders or aggressive braking, I use the higher end of the guideline and replace sooner.
Recognizing Warning Signs
I watch for reduced braking power, a spongy lever feel, or longer stopping distances. These changes often mean the pads are worn or contaminated.
I listen for squealing or grinding noises. A steady squeal can be a wear indicator; a harsh grind usually means the pad backing plate is contacting the rotor and needs immediate attention.
I also inspect visually for uneven wear, glazing (shiny surfaces), or excessive brake dust. If the pads look cracked or uneven, I replace them. Finally, vibration or pulsing at the lever or wheel suggests pad or rotor issues that I address before riding further.
Tips for Maintaining Brake Pad Condition
I focus on simple, regular actions that keep pads working and slow wear. Clean parts, keep fluids fresh, and avoid anything that clogs or soaks the pad surface.
Regular Cleaning Practices
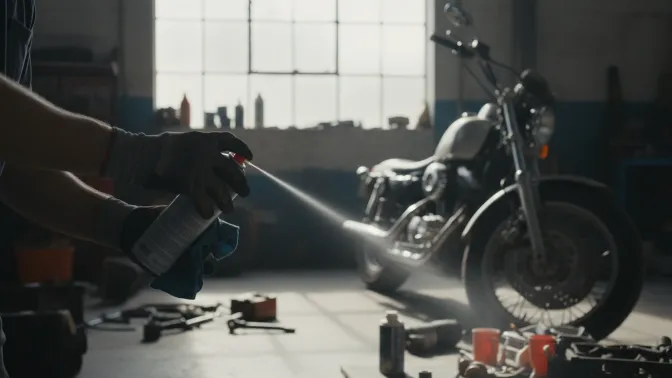
I clean calipers, pads, and rotors every 1,000–2,000 miles or after riding in mud or heavy rain. I use a soft brush and brake cleaner spray made for motorcycles. Spray the cleaner on the rotor and caliper, scrub gently, then wipe with a lint-free cloth.
I remove wheel if needed to access the pads. When pads are exposed, I check thickness and look for glazing or embedded metal. If I see glazing, I lightly sand the pad surface with fine sandpaper to restore bite.
I avoid using oily rags or household degreasers. Those leave residue that cuts braking power. I also dry parts fully before reassembly to prevent trapped moisture.
Avoiding Contaminants
I keep oil, chain lube, and brake fluid away from pads at all costs. Even small amounts of chain lubricant on the rotor will reduce stopping power and cause uneven wear. I clean any splatter immediately with brake cleaner.
When changing chain lube, I cover the rotor and caliper with a rag. I store spare oil and sprays away from the bike so accidental spills don’t happen. If a pad becomes contaminated, I replace it rather than trying to fully clean it.
I also check for brake fluid leaks at the caliper and master cylinder. Leaks can soak pads and ruin them quickly, so I tighten fittings and replace seals as soon as I find a drip.
Common Mistakes to Avoid
I sometimes see people judge pad life only by sight and miss thin spots hidden inside the caliper. Always check pad thickness at the visible edge and, when possible, sight through the caliper to confirm even wear. Don’t assume a little material left means the pad is safe.
I avoid replacing pads just by looking at wear indicators alone. Indicators help, but they can be misleading if the pad backing or rotor is damaged. Measure thickness: replace pads at or below about 2 mm of friction material.
I never skip cleaning the caliper area before measuring or replacing pads. Dirt and brake dust hide problems and give false readings. Use brake cleaner and a brush, and wear gloves and eye protection.
I don’t rely on one-wheel checks. Brakes wear differently front to back and left to right. Check every caliper and pad to find uneven wear, seized pistons, or rotor issues.
I avoid overtightening guide pins or caliper bolts when reassembling. Too much torque can bind the caliper and cause rapid wear. Follow the manufacturer torque specs.
I resist using the wrong pad compound just to save money. Cheap or incorrect pads can reduce stopping power and increase rotor wear. Match pad type to your bike and riding style.
Common mistakes are simple but risky. Catching them early keeps brakes working and riders safer.
FAQs
What thickness means replacement?
I replace pads when the friction material is about 2 mm or less. If I see uneven wear, cracks, or metal showing, I remove them right away.
Can I check pads without tools?
I often do a visual check through the caliper gap or look for wear indicators without disassembly. For a full inspection I use a flashlight and a feeler or ruler to measure thickness.
Are brake noises normal?
Some squeal can be normal from dust or light glazing. I investigate grinding or metal-on-metal sounds immediately because they usually mean severe wear or damage.
Should I bleed brakes when replacing pads?
I usually check brake fluid and bleed if the lever or pedal feels spongy after pad replacement. Air in the line reduces stopping power, so I don’t skip this step.
When should I seek a mechanic?
I go to a mechanic if I find seized caliper pistons, uneven pad wear I can’t fix, or if I’m unsure about pad fitment. A pro keeps me safe when the job gets complex.
Quick checklist I use:
Measure pad thickness
Inspect for uneven wear or damage
Check fluid level and lever feel
Listen for unusual noises
Conclusion
I check my motorcycle brake pads regularly to keep riding safe and predictable. Visual inspections, measuring pad thickness, and listening for unusual noises give me quick, useful information.
If I find pads at or below about 2 mm, I replace them right away. I also look for uneven wear, cracking, or glazing and address those issues without delay.
I keep a simple checklist: inspect, measure, listen, and replace. This helps me spot problems early and avoid brakes that feel soft or grabby.
For small jobs I do the work myself; for anything unclear I go to a trained mechanic. Proper tools and a clean workspace make the task safer and faster.
Bold steps I take:
- Inspect visually for wear and damage.
- Measure thickness; swap at ~2 mm.
- Check calipers and fluid while I’m at it.
I ride more confidently when my brakes are in good shape. Routine checks save time, money, and reduce risk on the road.