
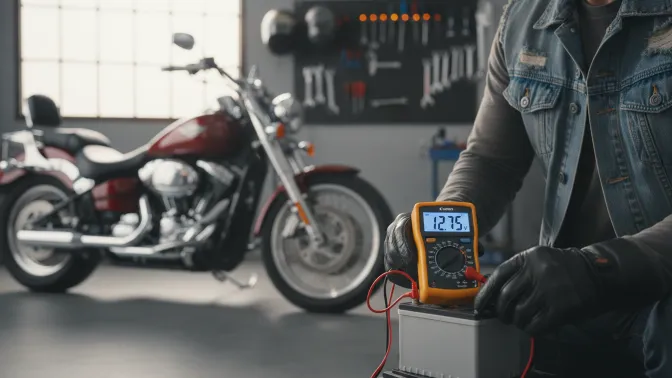
You want to know if your motorcycle battery will start your bike tomorrow, not just today. I’ll show you quick checks you can do with a visual inspection, a multimeter, and a simple load test so you get a clear yes or no about battery health. A healthy motorcycle battery shows about 12.6+ volts at rest and holds voltage under load; if it reads below 12.4 volts or drops a lot during a load test, the battery likely needs service or replacement.
I’ll walk you through what to look for on the battery case and terminals, how to use a meter, and how to spot charging system problems so you don’t mistake a bad stator for a bad battery. You’ll finish knowing when to charge, when to test more deeply, and when it’s time to swap the battery out.
Key Takeaways
- Check voltage and look for physical damage before any test.
- Use a multimeter and a load test to confirm battery condition.
- Verify the bike’s charging system if the battery drains quickly.
Why Motorcycle Battery Health Matters

I check battery health because it affects starting, lighting, and long-term costs. A weak battery can leave me stranded, reduce rider visibility, and force me to replace the battery sooner than expected.
Impact on Performance
A healthy battery delivers steady voltage for the starter and ignition. If voltage drops below about 12.4 V when the bike is off, the engine may crank slowly or not at all. I watch for slow cranking, dim headlights at idle, or stalls during low RPMs as clear signs the battery isn’t supplying enough current.
I also consider how accessories affect load. Heated gear, extra lights, or audio systems draw current and can overwhelm an aging battery. Keeping the battery near full charge helps the starter motor spin fast and the ignition produce consistent spark, which makes starting reliable in cold weather and after long stops.
Safety Considerations
Battery failure can create real safety hazards on the road. If headlights flicker or fail at night, I lose visibility and increase crash risk. Sudden electrical loss can also shut down indicators, brake lights, or fuel pumps, which can cause confusion or unexpected stops in traffic.
I inspect terminals for corrosion and check for swelling or leaks. Physical damage or acid leaks can cause shorts or fire risk. I never ride with a battery that shows bulging, heavy corrosion, or a strong chemical smell. Those signs mean I should replace the battery before my next ride.
Battery Lifespan
Battery life depends on charge cycles, temperature, and maintenance. I expect a typical lead-acid motorcycle battery to last 2–5 years under normal use. Frequent short rides, long storage without a tender, or constant deep discharges cut that lifespan considerably.
I extend life by keeping the battery charged, cleaning terminals, and avoiding deep discharges. Regular voltage checks and a simple load or charging-system test help me decide when to replace the battery rather than wait for a failure.
Signs of a Weak or Failing Motorcycle Battery
I watch for a few clear warning signs that tell me a battery needs checking: trouble starting, dim or flickering lights, and odd electrical behaviors like clicking or intermittent gauges. These symptoms often point to low voltage, poor terminal contact, or a failing cell.
Difficulty Starting the Motorcycle
If the engine cranks slowly or not at all, the battery likely has low charge or reduced cold cranking amps. I listen for a slow, labored starter spin or a rapid clicking sound when I press the starter; both indicate the battery cannot deliver enough current. A healthy 12V battery shows around 12.6–12.8V at rest; below 12.4V suggests a weak charge. I use a multimeter to check resting voltage and try a load test or starter draw measurement to confirm capacity. If the bike starts only after a jump or after several tries, I inspect charging system output with the engine running—stator or regulator issues can let a good battery drain. For how to test charging output, I refer to factory service guides or a trusted source like the Motorcycle Safety Foundation for basics.
Dimming Headlights
Headlights that fade when idling or dip while accelerating signal voltage instability. I note whether both high and low beams dim, or if only one beam changes; consistent dimming usually shows low battery voltage, while flicker tied to RPM can indicate a faulty stator or regulator/rectifier. I check voltage at the battery with the engine off and then at 3,000–4,000 RPM; voltage should rise above 13.5V when charging correctly. Corroded or loose terminals also cause voltage drops and dim lights, so I clean and tighten connections before replacing a battery. For wiring and charging checks, I use manufacturer wiring diagrams or reliable how-to guides like those on cycleworld.com.
Unusual Electrical Issues
Strange electrical behavior — blinking dash lights, intermittent horn, or erratic gauge readings — often traces back to weak battery power or poor connections. I inspect battery terminals for corrosion, swelling, or fluid leaks; physical damage often means internal failure. I also look for a swollen case, which indicates overcharging or a dying battery and requires replacement. If electronic accessories reset randomly or the ECU fault codes appear, I test the battery under load and verify charging voltage while running. In many cases, cleaning terminals, tightening grounds, and confirming steady charging voltage solves the problem; if not, I replace the battery with the correct type and CCA rating.
Preparing to Check Your Motorcycle Battery

I’ll get you ready with the tools, safety steps, and where to find the battery so you can test it without surprises. Gather the right gear, work in a well-lit space, and know how to access the battery safely before you begin.
Required Tools and Equipment
I keep a small kit for battery checks. The essentials are a digital multimeter (DC volts), a set of insulated wrenches or socket drivers that fit the battery terminals, and safety glasses. A battery load tester or a known-good hand-held jump starter helps when voltage looks borderline.
I also carry gloves, a soft wire brush or terminal cleaner, and dielectric grease for post-cleaning protection. If the battery has vent caps and is serviceable, bring distilled water and a funnel. Finally, have a flashlight or headlamp and a notepad to record voltage readings.
Organize tools on a non-conductive surface like a rubber mat. Keep metal jewelry away and set the bike on its center stand or stable surface before starting.
Safety Precautions
I always disconnect the negative (-) terminal first and reconnect it last to reduce short risk. Work in a ventilated area because batteries can emit hydrogen gas. Avoid sparks, open flames, and smoking near the bike.
Wear eye protection and gloves to guard against acid splashes. If the battery is swollen, cracked, or leaking, I don’t touch it directly—remove it with care and dispose of it at a proper recycling center. Keep a baking soda-and-water solution nearby to neutralize any acid spills quickly.
Follow manufacturer torque specs when tightening terminals. If you’re unsure about any step, I stop and consult the service manual or a professional mechanic.
Locating the Battery
Battery placement varies by model. It often sits under the seat, under a side panel, or beneath a removable subframe cover. I check the owner’s manual first; it names the exact panel and fasteners to remove.
To access under the seat, I remove fasteners or use the seat-release lever, then lift the seat straight up. For side panels, I remove bolts or clips and set them aside in a labeled container. If the battery is under the subframe, I support the bike and remove the necessary trim pieces in sequence to avoid missing screws.
Once exposed, I inspect the battery for labels showing voltage and type (AGM, gel, or wet). That tells me which maintenance steps and tests are safe to perform.
Visual Inspection for Battery Health
I start with a close look to find corrosion, cracks, or loose parts. These visual checks show most common problems and tell me if I should test voltage or replace the battery next.
Looking for Corrosion
I look for white, green, or blue powder around the posts and cable clamps. Corrosion can stop the bike from starting and cause dim lights. If I see buildup, I first disconnect the negative cable, then the positive, and clean the area with a toothbrush and a mix of baking soda and water or a commercial terminal cleaner. After cleaning, I dry the terminals and apply a thin layer of dielectric grease or battery terminal protector to slow new corrosion.
If corrosion has eaten metal away or left pitted terminals, I plan to replace the affected parts. Small surface corrosion I can clean safely at home. For heavy damage, I consult a shop or follow guidance from a manufacturer site like Battery University or an OEM manual.
Checking for Physical Damage
I inspect the battery case for cracks, bulges, or soft spots. A swollen or cracked case often means internal failure or overheating, and the battery must be replaced immediately. I press gently across the case to feel for soft areas that signal plate damage.
I also check the battery label for leaks or dried acid stains. Any sign of leakage or strong sulfur smell means I avoid skin contact and wear gloves. For sealed AGM or gel batteries, deformation still indicates failure and replacement is the safe choice.
Examining Battery Terminals
I check that terminals are tight, straight, and free of frayed cable strands. Loose terminals can cause intermittent starts and electrical faults. I use a wrench to ensure each terminal nut is snug but avoid overtightening plastic posts.
I inspect cable ends and connectors for corrosion, broken insulation, or stretched clamps. If clamps don’t grip firmly, I replace them or fit new terminals. I also follow the manufacturer’s torque spec when reattaching terminals and consult a trusted source like the motorcycle’s service manual or an official battery guide for proper procedures.
Testing Battery Voltage
I check voltage to see if the battery holds enough charge and if the charging system works while the engine runs. I focus on measuring resting voltage, and then on measuring voltage under load and while the bike is running.
Using a Multimeter
I use a digital multimeter set to DC volts (20V range). I turn the bike off and remove any accessories to get a true resting reading.
I touch the red lead to the positive terminal and the black lead to the negative terminal. I hold the probes steady and read the display.
If the battery has removable caps, I make sure the cells are clean and dry first. I clean corroded terminals with a wire brush and retest if needed.
For a quick load check, I switch the headlight on for a few seconds while watching the meter; a healthy battery will drop only a little under that brief load.
I wear safety glasses and keep metal tools away from the terminals. A shorted probe on the wrong surface can spark and damage the battery.
Interpreting Voltage Readings
At rest, I expect about 12.6–12.8 volts for a fully charged 12V lead-acid battery. Readings near 12.4V show about 75% charge; around 12.0V means the battery is low.
If the resting voltage is below 11.9V, the battery is likely sulfated or deeply discharged and may not start the bike.
With the engine running, I look for 13.5–14.8 volts at ~2,000 RPM. That range shows the stator and regulator are charging the battery.
If running voltage stays below 13.0V, the charging system may be failing. If it goes above 15.0V, the regulator may be overcharging and can damage the battery.
Conducting a Load Test
I focus the test on two things: whether the battery holds voltage under a start-level load, and how quickly that voltage drops. I use a proper load tester or a known load (starter draw) and check voltage before, during, and after the test.
How to Perform a Load Test
I start by fully charging the battery. If the battery isn’t fully charged, the test result will be misleading. I let it rest for at least one hour after charging so the surface charge settles.
I measure the open-circuit voltage with a digital voltmeter. A healthy 12.6–12.8 V reading shows full charge. Then I apply a load equal to about half the battery’s cold cranking amps (CCA) rating for 10–15 seconds. I watch the voltmeter during that period.
If I use a dedicated load tester, I follow the tool’s instructions and safety steps: gloves, eye protection, and no sparks near the battery. After the load, I remove the load and record the resting voltage again after one minute.
What Load Test Results Mean
If the voltage stays above ~9.6 V during the 10–15 second load, the battery usually has enough cranking power. A drop below 9.0–9.6 V indicates weak capacity and likely replacement. Consistently low resting voltage after the test (under 12.4 V) suggests the battery won’t hold charge.
If voltage recovers quickly to 12.6–12.8 V after the load, the battery often is healthy. Slow recovery or repeated failures on multiple tests point to internal sulfation or cell damage. I replace batteries that fail the load test or show large drops under load to avoid no-start situations.
Assessing Battery Electrolyte (For Conventional Batteries)
I check the electrolyte to see if the battery has the right fluid level and concentration. Both the level and the specific gravity tell me if the battery can hold charge and if any cells are weak or damaged.
Understanding Electrolyte Levels
I first remove the caps or open the vent covers on each cell only when the battery is cool and the bike is off. The electrolyte should cover the plates by about 5–10 mm (1/4–3/8 inch). If you see plates, the level is too low and the battery risks permanent damage.
I only add distilled or deionized water; tap water can add minerals that harm the plates. Fill slowly and avoid overfilling — leave a small air gap under the cap. Wear gloves and eye protection; electrolyte is corrosive.
Record low cells and check them again after a full charge. If levels drop quickly or a cell is repeatedly low, the battery may be failing.
Testing with a Hydrometer
I use a battery hydrometer to measure specific gravity in each cell, which shows state of charge and cell health. Draw electrolyte into the hydrometer until the float is free, then read the scale at eye level.
Healthy, fully charged cells typically read around 1.265 specific gravity for many lead-acid batteries, but check your battery’s spec. Readings below about 1.200 or a wide variation between cells indicate a weak or sulfated cell.
Always return the sampled electrolyte to the same cell after testing. Clean the hydrometer between cells and dispose of spills safely. If a cell reads low, charge the battery and retest; no change after charging means the cell likely needs replacement.
Diagnosing Battery Charging System Issues
I focus on the parts that control battery voltage and check for clear signs of failure: the alternator (stator) and the regulator/rectifier. I look for voltage readings, heat, and physical damage to wiring and connectors.
Alternator and Regulator Checks
I test the stator by measuring AC voltage at the stator leads with the engine running at 3,000–4,000 RPM. A healthy stator usually shows consistent AC voltage on all three phases; large differences between phases or a zero reading means a bad stator. I also inspect the stator for burn marks, melted insulation, or a smell of burnt windings.
I check the regulator/rectifier by measuring DC voltage at the battery with the engine running. If voltage reads about 14.2–14.8 V at steady RPM, the regulator is likely working. If voltage spikes above 15 V or drops below 13 V while revving, the regulator/rectifier may be failing. I also feel the unit for excessive heat and check wiring for loose or corroded connections.
Recognizing Overcharging or Undercharging
I watch the battery voltage over a short ride or with the engine at varying RPM. Undercharging signs include battery voltage staying below 13.0 V while running, dim lights at higher RPM, and a battery that never reaches full charge. Overcharging signs include voltage consistently above 15.0 V, boiling battery acid, a swollen case, or rapid loss of electrolyte in non-sealed batteries.
I use a multimeter and record readings at idle and 3,000 RPM. I log: battery voltage (engine off), voltage at idle, and voltage at 3,000 RPM. If readings show under 13.0 V at 3,000 RPM — suspect stator, bad connections, or a weak battery. If readings exceed 15.0 V — replace the regulator/rectifier immediately to prevent battery and electrical damage.
When to Replace or Service Your Motorcycle Battery
I watch voltage, cold cranking behavior, and physical signs to know when a battery needs work. I act fast if the bike struggles to start, the lights dim, or the battery shows corrosion or swelling.
Replacement Indicators
I replace the battery if the resting voltage reads below about 12.4 volts after a full charge. A multimeter reading under 12.0 V usually means the battery is weak and may not hold a charge.
I also look for slow cranking at start, repeated need for jump-starts, or sudden loss of electrical power while riding. Visible damage — bulging case, leaking fluid, heavy corrosion on terminals — calls for immediate replacement. Age matters too: most motorcycle batteries last 2–5 years, so I plan replacement sooner if the battery is older and showing any of the above signs.
Service and Maintenance Tips
I clean terminals with a brush and a baking soda solution to remove corrosion, then protect them with dielectric grease. I tighten loose connections; a poor contact can mimic a bad battery.
I check electrolyte levels on serviceable batteries and top with distilled water when low. I keep the battery charged with a smart charger or tender during storage and after long idle periods. For winter or long storage, I remove the battery and maintain it on a charger. I follow the owner’s manual for torque specs and battery type (AGM, gel, or flooded) when servicing or replacing.
How to Prolong Motorcycle Battery Life
I focus on two main actions: storing the battery correctly when not in use, and doing simple checks and upkeep while you ride. These steps cut the chance of a dead battery and help the battery last longer.
Proper Storage Practices
I remove the battery from the bike if I expect storage longer than a month. For lead-acid batteries I keep the electrolyte at correct levels; for sealed lithium or AGM batteries I leave caps closed and clean.
I store batteries in a cool, dry place away from direct sunlight. Ideal temperature is near 50–70°F (10–21°C). I avoid freezing and extreme heat because both reduce capacity and can cause permanent damage.
I use a smart maintainer or trickle charger for long storage. I set it to float mode and connect per manufacturer polarity. This keeps voltage stable without overcharging.
I also clean terminals and apply a thin coat of dielectric grease. That prevents corrosion and keeps the connection tight when I reinstall the battery.
Regular Maintenance Routines
I check battery voltage monthly with a digital multimeter. A resting voltage of 12.6V or higher usually means a full lead-acid battery; below 12.4V signals charge needed or weakening cells.
I inspect terminals, cables, and the case for corrosion, cracks, or swelling. I tighten loose connections to factory torque specs and replace frayed wiring immediately.
I run the bike at least every two weeks for 20–30 minutes or use a charger to maintain charge. Short rides that don’t fully recharge the battery will gradually drain it.
I keep a simple log of voltage readings, dates of charging, and any maintenance I do. That record helps me spot a failing battery before it leaves me stranded.
FAQs
How often should I test the battery?
I check mine every 3 months during riding season and before long trips. More frequent checks help catch slow failures early.
What voltage indicates a healthy battery?
A fully charged 12V battery reads about 12.6–12.8 volts at rest. If it reads under 12.4 volts, I consider charging and further testing.
Can I test the battery while the engine runs?
Yes. I measure voltage at idle and at about 2,000 RPM. The reading should rise to roughly 13.5–14.7 volts if the charging system works.
What if the battery passes voltage but the bike still has issues?
I then inspect cables, terminals, and the charging system. Corrosion or loose connections often cause problems even with a good battery.
When should I replace the battery?
I replace mine when it fails a load test, won’t hold charge, or shows physical damage. Age matters too—most batteries show signs of decline after 3–5 years.
Is it safe to test the battery myself?
Yes, if I wear eye protection and follow basic safety: work in a ventilated area, avoid sparks, and disconnect the battery when needed.
Quick checklist I use:
Visual check (leaks, swelling)
Voltage at rest
Voltage while running
Load test if available
Conclusion
I checked the key signs and tests that show a motorcycle battery’s health: visual inspection, voltage with a multimeter, and a simple load or running test. These steps give me clear, usable answers about whether a battery will start the bike and hold a charge.
If the voltage reads below about 12.4 volts at rest, I know the battery needs charging or deeper testing. A healthy charging system should raise voltage to roughly 13.5–14.5 volts while the engine runs. I treat any physical damage, leaks, or swelling as a reason to replace the battery immediately.
I keep a small multimeter and basic tools with my maintenance gear. Regular checks—especially before long rides or winter storage—save me roadside trouble. I also follow the battery type instructions; lead-acid and lithium batteries have different care needs.
Here are quick action steps I use:
- Check terminals for corrosion and tightness.
- Measure resting voltage, then test while running.
- Replace if voltage readings, damage, or poor load performance appear.
If I’m unsure after these checks, I take the battery to a shop for a professional load test. That gives me a definitive answer and keeps my bike reliable.