
You want to ride with control and feel safe from the start. I tell you to focus on bike setup, basic handling, and slow-speed maneuvers because those skills let you control the bike and avoid common mistakes. Get comfortable with your motorcycle’s fit and controls, practice braking and clutch work, and drill low-speed turns and balance to build real control.
Once you master those basics, you’ll notice your confidence grow quickly. I’ll guide you through simple drills, safety habits, and how to practice so each ride teaches you something useful.
Key Takeaways
- Start by making the bike fit you and learning the controls.
- Practice braking, clutch control, and slow-speed turns to gain control.
- Build confidence by repeating short, focused drills and tracking progress.
Getting to Know Your Motorcycle
I show you the parts you will use most and how the bike feels when you move it. Learn the controls, sense the weight, and run a quick safety check before every ride.
Understanding Controls and Dashboard
I start by sitting on the bike with the engine off and hands on the grips. Locate and identify the throttle (right grip), front brake lever (right hand), clutch lever (left hand), gear shifter (left foot), and rear brake pedal (right foot). Practice rolling the throttle and squeezing the front brake so your fingers and wrist know the feel and travel of each control.
Look at the dashboard: speedometer, tachometer, fuel gauge, neutral light, turn-signal indicators, and warning lights. Learn what each light means and where the high-beam and kill switch are. If your bike has ABS, traction control, or ride modes, note how to toggle them and what each mode does.
I also check switchgear for tightness and proper return action. Reaching, shifting, and braking should feel natural; if not, adjust lever position or handlebar angle until controls match your reach.
Familiarizing Yourself With Weight and Balance
I lift the bike slightly at the handlebars and the rear to feel its weight distribution. Try pushing the bike forward, backward, and side to side while stationary to learn how it pivots on the sidestand and center of gravity. This helps prevent drops when parking or maneuvering.
Mount and dismount several times to sense how the bike moves under my weight. Practice walking the bike while sitting and standing to feel the balance point. For taller or shorter riders, adjust seat height or use foot peg position if possible to improve stability.
Finally, ride slowly in a parking lot and practice low-speed turns, clutch control, and countersteering. These drills build muscle memory for how the bike responds to throttle, lean, and brake inputs.
Basic Inspection and Pre-Ride Checks
I follow a short checklist before every ride. Tires: check pressure and look for cuts or tread wear. Brakes: squeeze both levers and check for firm resistance. Fluids: glance at oil and coolant levels and spot any leaks under the bike.
Chain and sprockets: check tension and lubrication; look for stiff links. Lights and signals: test headlights, brake light, horn, and turn signals. Controls: ensure clutch and throttle move smoothly and return to neutral positions.
Use this simple table for a quick walk-around:
- Tires — pressure & condition
- Brakes — lever feel & pad wear
- Fluids — oil, coolant, brake
- Chain — tension & lube
- Lights — head, tail, signals, horn
- Controls — throttle, clutch, brakes
I correct any issues or delay the ride until a fix is made. A quick inspection takes minutes and prevents most small problems from becoming dangerous.
Mastering Fundamental Skills
I focus on three core skills that keep you safe and in control: starting and stopping smoothly, using the clutch and throttle precisely, and keeping balance at low speeds. Practicing these in a quiet, traffic-free area builds confidence quickly.
Starting and Stopping Smoothly
I begin every session by practicing controlled starts and stops. For starts, I place the bike in first gear, hold the front brake, slowly release the clutch to the bite point, then gently roll on the throttle. I look ahead, not down, and ease the clutch out fully once the bike moves without jerking.
For stops, I downshift through each gear as speed falls, apply steady rear brake then front brake, and use the clutch near stall speed. I aim for a smooth, predictable halt. I repeat controlled emergency stops at low speed to learn braking feel. The Motorcycle Safety Foundation provides clear drills that help build these habits.
Proper Clutch and Throttle Control
I treat clutch and throttle as a pair, not separate controls. I practice finding the clutch’s friction zone while the bike is on the sidestand or moving slowly. I keep my right wrist relaxed and roll on the throttle in very small, steady motions. Small throttle adjustments prevent sudden surges.
I also practice feathering the clutch while maintaining steady throttle to hold the bike on a slight incline. That teaches fine motor control and reduces stalls. For technical reference on clutch technique and throttle management, I use articles from reputable rider training schools and the MSF site to compare tips and drills.
Balancing at Low Speeds
Low-speed balance requires patience and repetition. I practice slow figure-eights, tight turns, and track stands in a parking lot. I look where I want to go, keep my torso upright, and use subtle throttle and rear brake to control speed. I move my hips slightly to help the bike lean without oversteering.
I also practice walking the bike while seated and while standing on the pegs to feel weight shifts. If the bike feels unstable, I stop, reset, and try the drill again at an even slower pace. Consistent low-speed practice builds static and dynamic balance that applies in traffic and tight spaces.
Essential Handling Techniques
I focus on clear, repeatable actions that build control and confidence. Good hand, foot, and body timing makes each move safer and smoother.
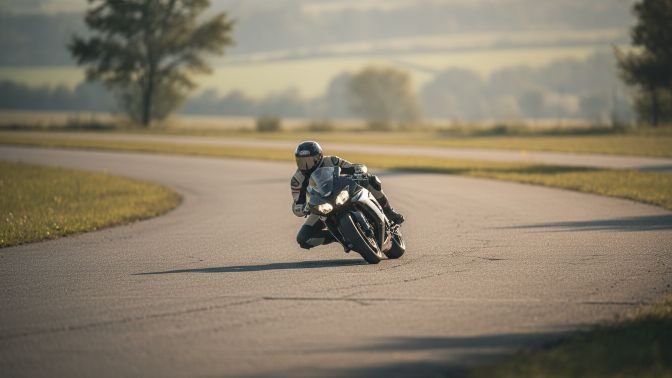
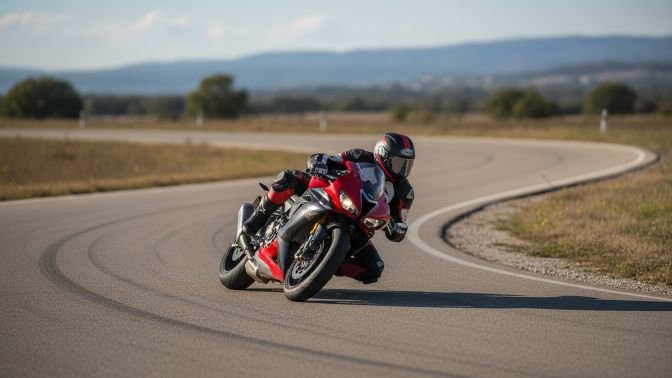
Turning and Cornering Safely
I look ahead through the turn and pick a line before I start steering. Eyes lead the horse; that tells my body where to go. I keep my inside leg slightly forward and my outside rein steady to prevent the horse from drifting wide.
I shorten my reins a little when entering a corner to keep consistent contact. I use a gentle inside rein to ask for bend, while the outside rein supports the horse’s shoulder. My seat follows the motion—I sit deeper on the inside seatbone and soften my hips.
I slow slightly before tighter turns rather than braking mid-turn. If the turn tightens, I ask for a small walk step or neck rein correction to keep balance. I practice on wide turns first, then tighten the radius as my control improves.
Effective Braking Techniques
I use a combination of seat, leg, and hand to stop a horse cleanly. First, I sit back and close my thighs to signal a slower pace. Then I give a soft, steady two-handed rein cue—thumbs up, hands low—to collect the horse without yanking.
If the horse ignores the first cue, I add a short, calm verbal cue and one brief squeeze of both reins. I avoid sudden, single hard pulls because they can cause the horse to brace or bolt. For emergency stops, I apply stronger back pressure with both hands while keeping my body relaxed and balanced.
I practice stopping at different paces and distances so my timing becomes reliable. I also rehearse releasing immediately when the horse responds, which rewards compliance and reduces resistance.
Shifting Gears Correctly
I teach myself clear aids for moving between walk, trot, and canter. For upward transitions, I close my seat and give a light leg squeeze; my hands stay steady to avoid blocking the horse’s mouth. I say a short verbal cue as I add leg so the horse links the cue to the action.
For downward transitions, I sit back, soften my knees, and use two steady reins to ask the horse to collect. I keep my leg on lightly to prevent the horse from dropping behind the vertical. I reward each clean transition with immediate relaxation of the aids.
I practice transitions within a rhythm—several short upward and downward shifts in a circle or along a fence. This helps the horse learn balance and responsiveness, and it sharpens my timing for smoother gear changes.
Practicing Maneuvering Exercises
I focus on exercises that build steering feel, balance, and timing. Small, repeatable patterns teach me how to use my hands, legs, and seat together and help the horse stay steady and responsive.
Slalom and Weaving
I set up a line of cones or poles spaced about 8–12 feet apart for a walk, and 12–18 feet for a trot depending on my horse’s stride. I ride straight toward the first cone, look where I want to go, and give a light inside rein while slightly closing the inside leg to ask the horse to bend through its ribcage. I keep my outside rein steady to avoid overbending.
I practice smooth, even rhythm through the line rather than sharp turns. If the horse rushes, I shorten my reins and use my seat to slow rhythm; if the horse falls out, I use my outside leg to keep the hindquarters tracking. I repeat the pattern both directions until I can weave evenly without heavy hands.
Figure Eights
I place two cones about 20–30 feet apart, depending on arena size. I ride a loop around one cone, then cross the center and loop the other, focusing on a smooth crossing where I change my bend and aids. I use the crossing point to practice straightness and quick, clear transitions of leg and rein aids.
I keep my eyes up and plan the line ahead so each loop stays round. I practice at the walk and trot, keeping tempo steady and asking for small, balanced changes of direction. If the horse shortens stride on the crossing, I soften my hands and use my seat to maintain rhythm before asking for the next loop.
Developing Awareness and Safety Habits

I focus on scanning, position, and speed to spot hazards early. I also practice emergency stops and quick reactions so I can stop or avoid a danger without panic.
Scanning Your Environment
I sweep my view from near to far every few seconds. I check mirrors, then quick-glance down the lane, then scan intersections and sidewalks for pedestrians, cars, and animals. This layered scan helps me spot brake lights, turn signals, and drivers on phones early.
I use a 12-second rule: I pick a point ahead and note what will affect me in the next 12 seconds. If I see brake lights, lane changes, or debris, I slow and shift position. I ride where drivers can see me—typically the left or center of my lane—unless road layout or obstacles force a change.
I keep mental notes: speed of cars around me, gaps between vehicles, and escape routes to my left or right. I also watch the road surface for gravel, oil, or potholes and adjust throttle and line to avoid them.
Emergency Stops and Quick Reactions
I practice emergency stops at low speed in a safe, empty lot until I can stop smoothly and in a straight line. I squeeze the front brake progressively while using the rear brake; I avoid grabbing the front brake suddenly. I keep my weight back and hips low to prevent flipping over the bars.
I rehearse quick swerves at moderate speed to learn how the bike steers under firm inputs. I look where I want to go, lean with the bike, and keep throttle steady through the maneuver for stability. I also practice low-speed balance stops and starts so I don’t panic when traffic suddenly slows.
I time drills with a partner or cones: stop from 20–30 mph, then from 10–15 mph. I note distances and adjust braking force. Regular practice builds muscle memory so my reactions stay calm and controlled on real roads.
Riding in Real-World Conditions
I focus on skills that keep you predictable and visible, and on techniques that help you handle changing pavement and traction. Practice positioning, speed control, and scanning so you can react calmly when traffic or road surfaces change.
Sharing the Road With Other Vehicles
I ride where drivers expect me and stay out of blind spots. I use lane position to increase visibility—slightly left in a lane to be seen by drivers turning right, and move right when approaching parked cars. I keep a following distance of at least two seconds in slow traffic and three to four seconds at higher speeds to give myself time to stop or swerve.
I scan intersections early and establish eye contact with drivers when possible. I signal well before changing lanes and tap my horn if a driver drifts into my lane. When passing, I accelerate smoothly and finish the pass quickly; I never linger in a vehicle’s blind spot. I ride defensively: expect other road users to make mistakes and plan an escape route for each situation.
Dealing With Different Road Surfaces
I check the surface ahead and adjust speed before I reach rough patches. On gravel or loose dirt, I reduce throttle input, keep the handlebars steady, and avoid abrupt braking. I shift my weight slightly back on steep gravel descents to keep the front light and stable.
On wet or oily patches, I slow early and use both brakes smoothly to avoid locking wheels. Painted lines, metal grates, and manhole covers get extra caution—cross them at a steady, upright angle and as straight as possible. For potholes, I lift slightly off the seat, keep a firm grip, and try to hit them squarely if unavoidable. I practice these responses in low-risk areas until they become automatic.
Building Confidence and Progressing Skills
I focus on simple, repeatable steps that build control, balance, and trust with the horse. Practicing at controlled speeds and slowly adding challenges helps me stay safe and steady while I learn.
Riding at Various Speeds
I start sitting and posting at the walk until my seat feels steady and my hands stay soft. I practice transitions: walk-halt-walk, then walk-trot-walk, using clear aids and deep breaths. Short, repeated transitions teach the horse to listen and give me quick feedback on balance.
When I trot, I concentrate on a steady rhythm and a relaxed lower leg. I count out beats or use a metronome app to keep timing consistent. For canter, I begin with a few strides after a controlled trot-canter transition, keeping my shoulders back and eyes up.
I always use a helmet and, when possible, a coach or experienced rider nearby. For safety and technique tips, I check guidance from the British Horse Society or the American Riding Instructors Association.
Gradually Increasing Ride Complexity
I increase difficulty only after I can perform basic tasks reliably. First I add longer trot sets and controlled canter loops on a straight line. Next I practice simple figures—large circles, serpentines, and a 20m circle—to improve bending and control.
I introduce new elements one at a time: a pole on the ground, a short hill, or a mildly uneven track. Each new challenge gets repeated in short sessions until I can do it confidently three times in a row. If I feel tense or the horse becomes resistant, I step back to a simpler task and retry.
I record short videos of my rides to spot tension in my posture and to track progress. I also keep a lesson log with goals for the week so each ride has a clear purpose.
Tracking Your Improvement and Setting Goals
I keep a simple riding journal to track what I practice and how it feels each session. Writing brief notes after every ride helps me spot patterns, like balance improving or trot transitions that still feel wobbly.
I set one main goal and two small milestones to reach it. For example: Main goal — ride a steady trot for five minutes; Milestones — hold correct posture for one minute, then for three minutes. Small wins keep me motivated.
I use basic tech like a phone timer, a GoPro clip, or a ride-tracking app to measure time, distance, and repeats. Video lets me see my position and compare progress week to week.
I review my journal and video once a month to adjust goals. If something isn’t improving, I change the practice drill or ask my instructor for targeted feedback.
I follow this quick checklist each week:
- Note what I practiced and for how long.
- Record one thing that went well and one thing to fix.
- Set a clear, achievable target for the next session.
I aim for steady, measurable steps rather than big leaps. That keeps practice focused and builds confidence without overwhelming me.
FAQs
How much practice do you need?
I recommend short, focused sessions—15 to 30 minutes—several times a week. Repetition builds muscle memory without wearing you out.
What gear should I wear while practicing?
I always wear a DOT helmet, gloves, sturdy jacket, long pants, and boots. Good gear protects you and lets you focus on learning.
Should I ride on the road right away?
I advise staying in a quiet parking lot or training range until basic skills feel natural. Low-traffic areas reduce risk and stress.
What drills help most?
I use slow-speed figure-eights, controlled stops, and emergency braking drills. These drills improve balance, clutch use, and brake timing.
Do I need a formal course?
I believe a Basic RiderCourse is very helpful. It gives structure, feedback, and safe practice under an instructor.
How do I track progress?
I keep a simple log: date, drill, duration, and one note about what improved. Small wins show steady progress and boost confidence.
What common mistake should I avoid?
I warn against overthrottling and panicked braking. Calm inputs and steady practice solve both problems.
Conclusion
I recommend starting with the basics: controls, balance, and slow-speed maneuvers. These build a foundation that makes every later skill easier and safer.
I focus on consistent practice in a safe space. Short, regular sessions help me retain clutch-throttle control, braking feel, and simple turns without pressure.
I wear full protective gear every time I ride. A helmet, jacket, gloves, and proper footwear reduce risk and let me concentrate on skill-building.
I set small goals and track progress. For example: 10 minutes of figure-eights, then a session on emergency stops. Small wins boost confidence and keep practice manageable.
I take a structured course if possible. An instructor spots habits I miss and teaches proven drills that speed up learning.
I review and repeat core skills until they feel natural. Balance, gear shifts, and smooth braking should become automatic before increasing speed or traffic exposure.
I keep learning after the basics. Advanced techniques and situational awareness come later, but they rest on the simple skills I practiced first.
Bold planning helps: schedule practice, list drills, and note what to improve. This keeps my training focused and steady.