
You want to know if your motorcycle has enough coolant and how to check it quickly and safely. I’ll show you where the reservoir and radiator cap usually sit, how to tell levels by sight, and what to do if the level looks low. Check coolant only when the engine is cool; locate the overflow tank or sight glass and make sure the fluid sits between the minimum and maximum marks.
I write from experience and keep the steps short so you can check the system in minutes. Follow simple safety steps, look for leaks or discolored fluid, and learn when to top up or get professional help to avoid overheating on the road.
Key Takeaways
- Always wait for a cool engine and use the sight glass or overflow tank to check level.
- Look for leaks, color changes, or low marks as signs of trouble.
- Top up with the correct coolant and schedule regular maintenance.
Why Checking Motorcycle Coolant Levels Is Important

I check coolant levels because a correct fluid amount keeps the engine at safe temperatures, preserves power delivery, and stops corrosion and gasket damage. Each check takes only a few minutes but can prevent costly repairs.
Preventing Engine Overheating
I start each inspection when the engine is cold so the coolant in the reservoir shows an accurate level between the “min” and “max” marks. Running low lowers the system’s ability to move heat away from the cylinders and head, which can cause the engine temperature to spike quickly under load or in traffic.
If the bike overheats, I risk warped heads, blown head gaskets, or seized pistons. Those repairs are expensive and time-consuming compared with topping off the reservoir or finding a leak. I also watch for discolored or foamy coolant, which can signal combustion gases in the cooling system or air pockets that reduce cooling efficiency.
Maintaining Performance
Coolant at the right level helps the engine reach and hold its designed operating temperature. I notice better throttle response and more consistent power when the bike runs within the correct temperature window. Too-cold running from overuse of plain water, or too-hot running from low coolant, both harm combustion efficiency.
I use the manufacturer’s recommended coolant type and mixture because the wrong coolant can change boiling and freezing points and alter heat transfer. Regular level checks let me spot slow losses from small leaks or evaporation before they reduce performance on a long ride.
Protecting Internal Components
Coolant does more than cool; it contains corrosion inhibitors that protect the radiator, water pump, hoses, and engine passages. I check levels to ensure those inhibitors stay concentrated enough to prevent rust and pitting inside the system.
Low coolant exposes metal parts to air and increases cavitation in the water pump, which can wear the impeller and seals. I also inspect hoses and clamps during level checks so I can replace brittle hoses or tighten clamps before they fail and let coolant escape.
Locating the Coolant Reservoir and Radiator Cap
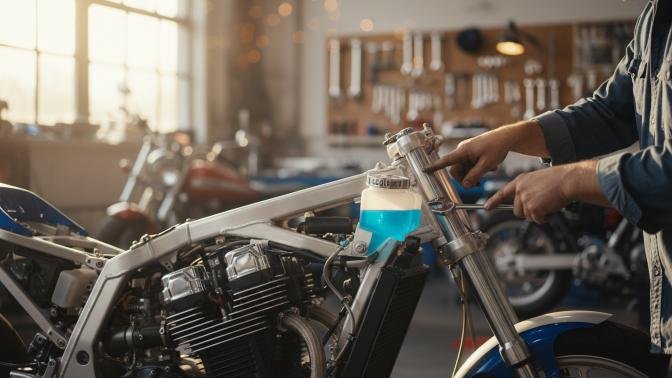
I will show where to find both the overflow reservoir and the radiator cap, and I’ll point out common spots on different bike types so you can check levels safely.
Identifying Coolant Reservoir Placement
I first look under the seat or behind side panels on most sport and street bikes. The reservoir is usually a translucent plastic tank with MIN and MAX marks. It often sits on the right or left frame rail near the battery or airbox so I can read the level without removing parts.
On dirt bikes and smaller commuters the tank may be smaller and mounted near the front of the frame. If your tank has hoses running to the radiator, trace those to confirm it’s the coolant reservoir. Always check when the engine is cool; I never open a hot radiator cap.
Motorcycle Models With Hidden Reservoirs
Some cruisers and adventure bikes hide the tank under fairings or behind cosmetic covers. I remove a few fasteners or the seat to access it. On models with center-mounted radiators the overflow can sit low behind the radiator shroud, so I crouch and peer from the front to read the marks.
A few modern bikes use an expansion bottle tucked under the fuel tank or inside a side cover. If I can’t find a translucent tank, I check the service manual or look for a labeled cap near the radiator hose junction.
Safety Precautions Before Checking Coolant
I always put safety first when I check coolant. I focus on cooling the engine fully and using the right protective gear and tools to avoid burns, spills, or contamination.
Allowing the Engine to Cool
Never touch the radiator, coolant reservoir, or hoses until the engine has cooled. I let the bike sit for at least 30 minutes after riding, longer if I ran it hard or the ambient temperature was high. Pressure and hot steam can cause severe burns if I open the reservoir or radiator cap too soon.
I check the temperature by feeling the frame near the engine and looking at the temperature gauge if the bike has one. If the engine still feels warm, I wait and recheck; I only open the reservoir when it feels room temperature. For a quicker cooldown, I move the bike to shade and keep the side stand down to let airflow stop around the engine.
If I suspect a stuck cap or pressure build-up, I wear thick gloves and use a rag to slowly loosen the cap to let trapped pressure escape. I avoid leaning over the reservoir while doing this.
Protective Gear and Tools Required
I wear safety glasses, heat-resistant gloves, and long sleeves to protect my face, hands, and arms from splashes. Coolant can irritate skin and eyes, and it is toxic to pets, so I keep animals away and clean spills immediately.
I carry a funnel, a clean container for old coolant, and a 50/50 premixed coolant or concentrate plus distilled water as specified in my motorcycle owner’s manual. I use a flashlight to inspect the reservoir for color and debris and a clean rag to wipe the cap and filler neck before opening.
For disposal, I place used coolant in a sealed jug and take it to a local recycling center or an auto shop that accepts hazardous liquids. Many municipalities list approved drop-off sites; I check resources like the EPA’s household hazardous waste guidance (https://www.epa.gov/recycle) and my local government site for proper disposal rules.
How To Check Coolant Levels on a Motorcycle
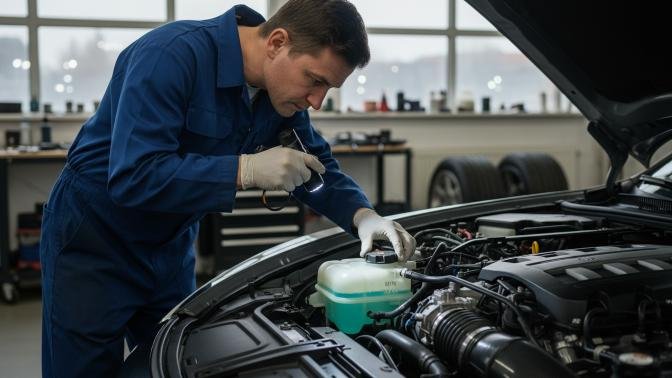
I check coolant level by looking at the plastic overflow tank, and when needed I verify the radiator directly. I always work on a cool engine and use the maker’s recommended coolant.
Inspecting the Coolant Reservoir
I first locate the clear plastic overflow reservoir, usually near the radiator or under the seat. With the bike cold, I read the fluid between the “MIN” and “MAX” marks on the side. If the coolant sits below MIN, I top it to the correct level with a 50/50 mix of distilled water and the specified antifreeze.
I also check the color and clarity. Coolant should be bright (common colors are green, orange, or pink) and free of rust, oil, or heavy debris. If it looks brown or cloudy, I plan a full flush because contamination can block passages and cause overheating.
Checking Through the Radiator Cap
I only remove the radiator cap when the engine is fully cold to avoid scalding. I wipe the cap and surrounding area before opening to stop dirt from falling in. When I lift the cap, I look for coolant right at the neck and a clear return flow into the radiator.
If there’s no coolant at the top or the level is low, I add coolant slowly until it reaches the fill point. If I see bubbles, a milky film, or oil in the radiator, I treat that as a sign of a head gasket or internal leak and schedule repairs.
Evaluating Coolant Markings
I compare the reservoir marks with the motorcycle manual because brands use different mark positions for cold and hot readings. I treat the cold-mark reading as the baseline; a proper cold level sits between the cold MIN and MAX marks. Hot markings, when present, show expansion level and are not used to refuel.
I keep a log of how often I top up. If I add small amounts frequently, I inspect hoses, clamps, and the radiator for leaks. Consistent loss means a leak or internal issue and needs mechanical attention.
What to Do If Coolant Levels Are Low
I check the level, pick the right coolant, and top it up safely. I treat low coolant as a sign to inspect for leaks or head gasket issues before I ride.
Selecting the Right Coolant
I always use the coolant type specified in my motorcycle’s owner manual. Many bikes need a specific mix of ethylene glycol or propylene glycol and corrosion inhibitors for aluminum engines and radiators. Using the wrong type can cause corrosion or sludge buildup, which lowers cooling performance.
If the manual lists a premixed coolant, I buy that. If it calls for concentrated coolant, I mix it 50:50 with distilled water unless the manual states a different ratio. I avoid tap water because minerals can harm the system. When in doubt, I match the OEM brand or ask a dealer for the exact spec.
How to Top Up Coolant Safely
I only open the radiator cap or overflow tank when the engine is completely cool. Hot coolant and steam can cause severe burns. I wear gloves and eye protection as an extra safety step.
I park the bike on level ground. I check the overflow tank markings (MIN/MAX) and add coolant to between those lines. If the bike has a sealed radiator cap, I follow the manual’s steps for pressure release. I pour slowly and use a funnel to avoid spills.
After topping up, I run the engine for a few minutes with the heater or coolant system active, then let it cool and recheck the level. I inspect for visible leaks and watch the temperature gauge on a short test ride. If levels drop again, I stop riding and get a mechanic to find the leak.
Common Signs of Coolant Problems
I watch for clear visual leaks and engine temperature changes. These signs tell me when the cooling system needs attention right away.
Visible Leaks or Stains
I inspect under the bike after it has been parked for a few hours. Look for puddles or damp spots beneath the engine or near the radiator. Coolant often has a bright color — green, pink, or orange — and a sweet smell. Dark or rusty fluid suggests contamination or corrosion.
Check hoses, clamps, and the overflow reservoir cap for wetness or white crusty deposits. A thin trail on the frame or engine usually marks a slow leak. If you see bubbles in the overflow tank when the engine is running, that can mean a head gasket leak or trapped air. I refer to manufacturer pages like the Motorcycle Safety Foundation or a trusted service manual for model-specific leak points.
Overheating Indicators
My first sign of low coolant is the temperature gauge rising above normal or the warning light coming on. The engine may run hotter at idle, or the thermostat can stick and cause sudden temperature spikes. You might notice reduced power, pinging sounds, or the coolant boiling in the radiator cap (steam or hissing).
I also watch for frequent trips to top up coolant. If the bike overheats repeatedly after a refill, the issue likely isn’t just low level. Radiator fan failure, clogged passages, or a bad water pump can cause similar symptoms. For diagnosis steps and safe testing methods, I consult reputable sources such as manufacturer service guides or automotive cooling system pages from major mechanics.
Coolant Maintenance and Replacement Schedule
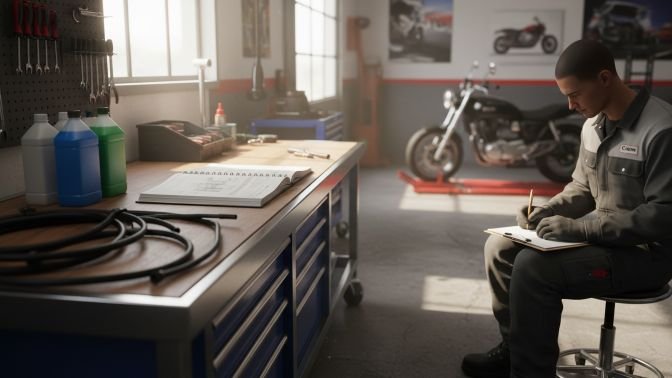
I check coolant on a set schedule and after any signs of leaks or overheating. I track both time and mileage, and I inspect the reservoir and hoses at every oil change.
Recommended Interval for Coolant Changes
I change coolant based on the motorcycle maker’s schedule or every 2 years / 24,000 miles, whichever comes first, unless the manual says otherwise. Many modern bikes use long-life coolant rated for 3–5 years; older bikes often need fresh coolant every 1–2 years.
I follow these checks:
- At each service: inspect reservoir level, hose condition, and cap seal.
- Every year: look for color change, debris, or rust in the coolant.
- At coolant change: flush the system if coolant is dirty or contains contaminants.
If I see oil in the coolant, persistent overheating, or repeated low levels, I replace coolant immediately and diagnose the cause.
Tips for Long-Term Coolant Health
I use the exact coolant type the manufacturer specifies and never mix different chemistries. Mixing can reduce corrosion protection and shorten coolant life.
I keep a simple checklist:
- Use a 50/50 mix of antifreeze and distilled water unless the manual specifies a different ratio.
- Replace worn hoses and a failing cap to prevent air ingress.
- Store coolant in a sealed container and avoid contamination when topping up.
I also pressure-test the system during major services to find leaks early. Small fixes now prevent head gasket or radiator failure later.
FAQs
When should I check my motorcycle’s coolant level?
Always check coolant when the engine is completely cold. Opening the radiator or reservoir while the engine is hot can cause burns from pressurized hot fluid. Waiting at least 30 minutes after riding, or longer if the bike ran hard, ensures an accurate reading.
How do I know if my coolant level is correct?
Check the translucent overflow or reservoir tank. The fluid should sit between the “MIN” and “MAX” marks when the engine is cold. Some bikes have hot and cold marks, but use the cold marks as the baseline for topping up.
What type of coolant should I use?
Always use the coolant type recommended in your motorcycle owner’s manual. Many bikes require a 50/50 mix of antifreeze and distilled water. Using the wrong type or mixing different chemistries can reduce corrosion protection and damage the system.
What signs indicate coolant problems?
Look for visible leaks, discolored or cloudy coolant, foam, or oil contamination. Engine overheating, rising temperature gauge readings, or frequent need to top up coolant also indicate potential problems in the cooling system.
How do I top up coolant safely?
Only add coolant when the engine is cold. Use gloves and eye protection, pour slowly using a funnel, and fill to the correct level between the MIN and MAX marks. After topping up, run the engine briefly, let it cool again, and recheck the level for leaks or drops.
Conclusion
I check my motorcycle coolant before rides and after long trips. A quick visual check of the reservoir and hoses takes only a few minutes and can prevent overheating.
If the level sits between the low and high marks, I leave it alone. If it’s low, I add the manufacturer-recommended coolant and watch for leaks.
I always wait for the engine to cool before opening the system. That keeps me safe from hot fluid and pressure.
I keep a simple maintenance checklist: inspect reservoir, feel hoses, look for leaks, and note coolant color. This routine helps me catch problems early.
If I find serious leaks, discolored coolant, or repeated drops in level, I seek professional help. That avoids engine damage and costly repairs.