

You want your forks to work right and keep you safe on every ride. Check fork oil by removing the filler cap, compressing the fork to measure the oil height from the top of the tube, and compare that gap to your bike’s spec—adjust if it’s off. I will show you the exact steps, tools, and signs to watch for so you can do this quickly and correctly.
I’ll walk you through where the filler cap hides, how to measure the oil level, and simple tips to avoid mistakes. My goal is to make this task clear and doable, whether you wrench in your garage or just want to understand what a mechanic is doing.
Key Takeways
- Know the correct oil height and how to measure it with the fork compressed.
- Learn where the filler cap is and which tools you need for an accurate check.
- Spot common signs of low or wrong oil level and when to get professional help.
Understanding Fork Oil and Its Importance
I explain what fork oil does, why its level matters, and what happens when the level is wrong. Read the short subsections to learn what to check and how problems affect handling.
What Is Fork Oil?
Fork oil is a hydraulic fluid inside the motorcycle fork tubes. I use it to lubricate internal parts, reduce friction, and provide damping by forcing oil through valves and shim stacks as the fork compresses and rebounds.
Fork oil also helps remove heat from the fork during heavy use. Its viscosity — measured in SAE or weight — controls how fast the oil moves through damping passages. Thicker oil gives firmer damping; thinner oil gives softer damping.
Fork oil is not engine oil. It has different additives and must match the fork manufacturer’s spec. Using the wrong type or dirty oil will change fork behavior and can cause premature wear.
Why Fork Oil Level Matters
The fork oil level sets the balance between oil and air in the fork leg. I check the level because it changes how the fork compresses and how progressive the spring rate feels near the end of travel.
A higher oil level reduces the air chamber, making the spring feel stiffer late in the stroke and improving small-bump control. A lower oil level increases the air volume, making the fork feel softer and more prone to bottoming.
Consistent level between both forks matters for stable steering and predictable braking. I always measure oil level with the fork at the specified extension length and follow the service manual numbers for my bike.
Impacts of Incorrect Fork Oil Levels
Too much oil can make the fork harsh on small bumps and reduce overall travel feel. I may notice twitchy steering, reduced grip in rough sections, or a tendency to skip over potholes.
Too little oil causes excessive bottoming, poor damping control, and increased wear on seals and bushings. The fork may dive excessively under braking and feel wallowy during cornering.
Unequal levels between forks cause pull to one side, uneven tire contact, and inconsistent cornering. Fixing the level is a simple adjustment that restores handling and extends fork component life.
Preparing to Check Motorcycle Fork Oil Levels
I will get the bike stable, gather the right tools, and follow safety steps so the check is accurate and safe. Read the bike manual for the exact oil height and work on a level surface.
Tools and Materials Needed
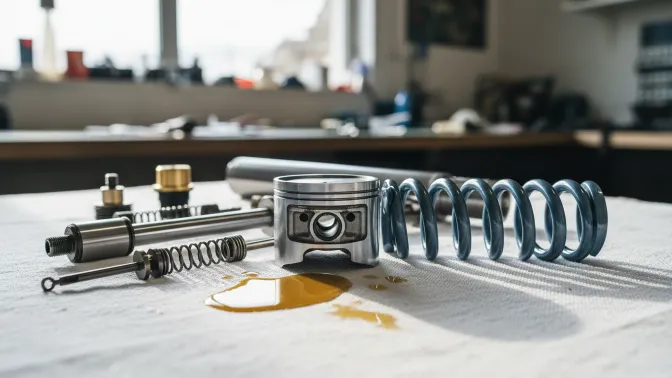
I use a simple, repeatable kit to check fork oil: a torque wrench for pinch bolts, a long thin ruler or depth gauge to measure oil height, a manual syringe or oil pump for precise fluid transfer, and clean lint-free rags. I keep the correct fork oil grade and volume from the service manual on hand. A rear stand or front paddock stand that lifts the wheel off the ground makes the measurement easier and more consistent.
I also bring paper towels, a clear container to catch old oil, and nitrile gloves. If the forks have internal spacers or special caps, I carry the OEM seal drivers and a small flashlight. I store tools on a clean tray to avoid contamination.
Safety Precautions and Best Practices
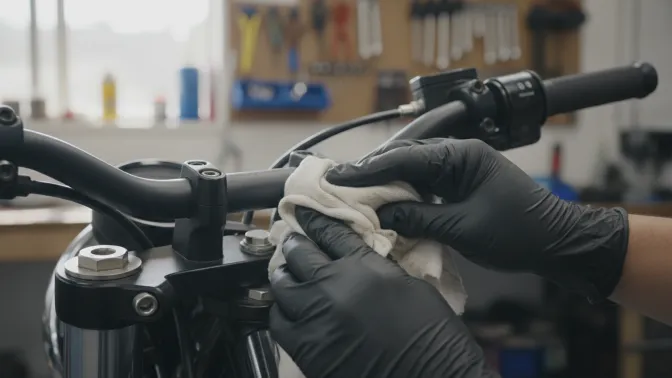
I always park the motorcycle on level ground and secure it with stands before loosening fork caps. A tilted bike gives a false oil height reading. I wear gloves and eye protection when handling oil and use cardboard or a drip tray to protect the floor and bike paint.
I follow torque specs from the owner’s manual when tightening pinch bolts and fork caps to avoid damage. I work on one fork at a time to keep measurements consistent. If the forks are hot from recent riding, I let them cool to room temperature because oil level changes with temperature. For official guidance on torque and oil type, I reference the motorcycle’s service manual and reliable sources like manufacturer’s technical pages or a suspension specialist site such as Öhlins or the factory service documents.
Locating the Fork Oil Filler Cap
I’ll show where the fork oil filler cap lives and how to get to it on common motorcycle forks. Knowing the fork type and the typical cap locations saves time and prevents damage.
Identifying Fork Type
First, I check whether the bike has telescopic forks or upside-down (USD) forks. Telescopic forks have the larger outer tube at the bottom and the smaller inner tube sliding inside; USD forks have the larger tube at the top and the smaller stanchion at the bottom. Many street bikes use USD forks up front, while older or budget models often use conventional telescopic forks.
Next, I look for a single-chamber or cartridge-style layout. Single-chamber forks usually have a simple cap at the top of the fork leg. Cartridge or cartridge-closed cartridges sometimes hide the filler under a small plug or require removing the fork cap to access an internal reservoir. I also inspect for external markings, a hex or slotted head, or an allen/hex socket — these identify the tool I’ll need.
Accessing the Filler Cap
I secure the bike upright on a stand so the front wheel is off the ground or firmly supported. This prevents fork damage and lets the legs extend naturally. Then I remove any windscreen, handlebar crossbar pad, or upper triple-clamp covers that block access to the top of the fork tubes.
At the top of each fork tube I clean around the cap to avoid dirt falling in. Caps commonly use a large hex, allen key, or slotted screwdriver. I match the tool to the cap and turn slowly; some caps are preload adjusters and thread into the damping rod, so I stop if resistance feels odd. If the cap is recessed under a small plug, I pry out the plug gently with a flat blade, then use the correct socket or key to remove the actual filler cap.
How to Check Fork Oil Levels Step by Step
I will show the exact steps I use to check fork oil levels safely and accurately. I focus on positioning the bike, removing the top cap correctly, and measuring the oil height with a ruler or gauge.
Proper Motorcycle Positioning
I put the bike on a flat, level surface and use a center stand or paddock stand so the front wheel hangs freely. If my bike has a front stand, I remove it; the forks must be unloaded so the sliders drop to normal ride height.
I straighten the handlebars and secure them so they don’t turn during the check. I note the bike’s normal sag or ride height from the manual, because oil height is measured relative to the top of the fork tube when the fork is fully extended.
I warm the forks with a short ride or by operating the forks a few times on the stand to settle the oil. That removes air bubbles and gives a repeatable oil level reading.
Removing the Fork Cap
I loosen the fork cap slowly to relieve any pressure. I clamp the fork tube low in a soft-jawed vise or use a fork holder to prevent the tube from turning.
I back out the cap and remove any springs or spacers carefully, noting their order and orientation. I keep parts in a clean tray and use a clean rag to catch any drips.
If the cap is sealed with a rebound damping assembly, I follow the service manual instructions for partial disassembly. I avoid forcing the cap; many caps have a retaining clip or require a special tool.
Measuring Fork Oil Level Accurately
I compress the fork fully and then extend it slowly to the fully extended position before measuring. I insert a clean, thin ruler or specialized depth gauge down the tube until it touches the fork slider top or the damper rod, depending on design.
I note the oil height from the top of the fork tube in millimeters, as the manual specifies. If the manual gives a measurement from the top of the slider or a specific reference mark, I use that point for accuracy.
I repeat the measurement three times, wiping the ruler between tries, and use the average value. If the oil level is low, I add the exact amount or raise the oil to the specified height, then reassemble in the reverse order, torqueing the cap to spec.
Common Signs of Incorrect Fork Oil Levels

I watch for handling changes and physical leaks first. Low oil usually causes harsh bottoming and reduced damping, while too much oil makes the fork feel stiff and can cause seal damage.
Symptoms of Low Fork Oil
Low fork oil often makes the front end feel harsh over bumps. I notice the fork bottoms out easily on hard hits and the ride feels choppy at low speeds. Damping feels weak on rebound; the fork can extend too fast after compression, which makes the bike feel unstable under braking.
You may also see oil leaking or frothy foam inside the fork if air mixes with the remaining oil. That reduces damping consistency. For more on suspension behavior and safe limits, I check manufacturer’s specs or a trusted source like the Motorcycle Safety Foundation for ride-safety tips.
Effects of Overfilled Forks
Overfilled forks reduce the air gap and make the springing more progressive than intended. I feel the front end harsh on small bumps and unusually stiff in mid-stroke, which hurts traction and steering precision. The fork can resist compression too much, causing the bike to skip over rough surfaces.
Too much oil raises internal pressure and can force oil past the seals. I’ve seen seal wear and leaks follow an overfill. For correct oil heights and measurement methods, I consult official service manuals or reliable guides such as OEM documents and technical pages from suspension specialists.
Tips for Maintaining Optimal Fork Oil Levels
I focus on routine checks, using the correct oil weight, and keeping notes of ride conditions and services. These steps keep my forks responsive and reduce wear.
Recommended Fork Oil Change Intervals
I change fork oil based on the bike and how I ride it. For street bikes I aim for every 6,000–10,000 kilometers or at least once a year. For dirt bikes or frequent off‑road use, I shorten that to every 1,000–3,000 kilometers or after heavy riding sessions.
I inspect seals and sliders each time I change oil. If I see pitting, leaks, or dirty oil, I replace oil sooner. I also pay attention to feel: increased harshness, bottoming, or poor damping means it’s time to service.
I keep a simple log with date, kilometers, oil weight, and notes about ride conditions. That lets me track when to service next and spot trends before failures occur.
Choosing the Right Fork Oil
I pick oil by viscosity and manufacturer guidance. Common choices range from 5W to 20W; lighter oil gives quicker action, heavier oil gives firmer damping. I always check the bike’s service manual for the recommended weight and volume per leg.
I consider riding style when I tune oil weight. I use heavier oil for fast street or carrying loads, and lighter oil for lighter riders or smooth roads. When unsure, I start with the manual recommendation and adjust in 1–2 wt steps.
I also use a quality, stable fork oil and replace it if contaminated. Clean oil keeps seals alive and damping consistent. I seal bottles tightly and store them away from heat to avoid degradation.
When to Seek Professional Service

I recommend seeing a pro if you spot oil leaking from the fork seals or lower legs. Leaks mean parts are worn or damaged and need hands-on inspection and repair.
If the suspension feels harsh, bottoms out easily, or the bike handles oddly, I would get a mechanic to check oil level and damping. Those symptoms can come from wrong oil height, wrong viscosity, or internal damage.
I advise professional help when you must remove forks from the triple clamps or disassemble the internals. Many bikes need special tools or measured oil volumes that I don’t recommend attempting at home.
If the forks have not been serviced in years, or the oil looks gritty or dark even after draining, I insist on a service. Contaminated oil can hide worn bushings or scoring that a tech should assess.
Cost, time, or lack of tools are good reasons to go pro. A certified shop can measure oil volume, replace seals, and test ride the bike for proper damping.
I suggest asking the shop to show you the work and the used oil. That helps me confirm the issue was fixed and teaches me what to look for next time.
FAQs
Is it safe to ride after adding oil?
I test the forks on a short, slow ride to confirm feel and leaks. I recheck torque on caps and seals before road use.
Quick checklist:
I level the bike and follow the manual.
I measure at full compression per spec.
I use the correct oil type and amount.
I inspect seals and test ride after service.
How do I measure the oil level?
I fully compress the fork (with the spring out or as the manual directs) and measure the air gap from the top of the tube to the oil surface. I follow the service manual for the exact millimeter spec.
Can I check the level without special tools?
Yes. I use a clean ruler or a fork level tool for better accuracy. A flashlight helps me see the oil surface inside the tube.
What oil weight should I use?
I pick the weight my bike’s manual recommends. Lighter oil moves faster; heavier oil gives firmer damping. Changing weight affects feel, so I make small changes.
How do I know if the oil needs replacing?
I replace it if it looks dark, foamy, or gritty, or if the forks feel sticky or overly soft. Regular repla
Conclusion
I checked the steps and tools for fork oil level so you can do this safely and accurately. Follow your service manual for the exact level and use the correct oil weight for your fork type.
I recommend measuring with the fork fully compressed without the spring, or using the dipstick method if your manual allows it. Record your measurements and note changes after rides to spot leaks or wear early.
If the level is wrong, add or remove oil in small amounts and remeasure. Wear gloves and keep parts clean to avoid contamination and damage.
If you feel unsure, I suggest a mechanic with fork experience to help. Proper oil level affects handling and safety, so getting it right matters.