
You want to know if your motorcycle fuel lines are safe and working. Start by looking for cracks, soft spots, hardening, or wet areas along the hose and at every fitting; these signs tell you when a line needs cleaning, tightening, or replacement. If you spot leaks, cracks, or fuel smell, stop riding and fix or replace the lines before you ride again.
I’ll show you how to find the lines, check for damage, test flow and pressure, and decide when to replace parts or call a pro. Follow simple safety steps and basic tests so you can keep your bike running and avoid dangerous leaks.
Key Takeways
- Inspect fuel hoses and fittings visually and by touch for wear or leaks.
- Test fuel flow and petcock function to confirm system performance.
- Replace damaged lines and seek professional help if you find fuel leaks or unclear problems.
Understanding Motorcycle Fuel Lines

I explain what fuel lines do, which types you’ll see, the materials they’re made from, and how to spot when they fail. Read each part to learn how to identify, inspect, and choose the right line for your bike.
Types of Fuel Lines
Fuel lines fall into a few common types based on application and pressure.
- Primary/low-pressure lines: carry fuel from tank to petcock or filter. They work at gravity or low pump pressure and are usually larger in diameter.
- Return/high-pressure lines: used on fuel-injected bikes to send excess fuel back to the tank. These handle higher pressure and need secure fittings.
- Vent and overflow lines: thin tubes that route spills or tank venting away from hot parts.
- Primer or overflow hoses on carbureted bikes: short runs that let fuel back into the bowl or catch pan.
I check diameter markings and routing when replacing lines. Correct size and fittings matter: too small restricts flow; too large can leak. Secure clamps at every barbed or threaded joint.
Common Materials Used
Manufacturers use different hoses and fuel-rated plastics.
- Rubber (Nitrile or EPDM): common on older bikes and carburetors. It resists gasoline but can age and crack from heat and ethanol.
- Fuel-injection rated synthetic (Viton, PTFE-lined, or braided nylon): made for higher pressure and ethanol blends. These last longer and resist swelling.
- PVC or general-purpose hose: affordable but often not safe for modern fuels. Avoid unless labeled “fuel rated.”
- Clear vinyl: useful for diagnostics and gravity feed but degrades faster with ethanol.
I look for fuel-rated labels, temperature range, and pressure rating before fitting a hose. Use clamps sized for the barb and material. Replace rubber lines every few years or sooner if soft, cracked, or swollen.
Symptoms of Bad Fuel Lines
Bad lines show predictable signs that affect performance and safety.
- External cracks, hard spots, or soft swollen areas mean the hose has aged or reacted to fuel.
- Smell of gasoline around the bike or visible wet spots suggests a leak in a line, connection, or petcock.
- Engine sputter, stalling, or hard starting can come from collapsed or clogged lines restricting flow.
- Fuel pooling under the tank or near the carburetor/cylinder head points to a disconnected or split hose.
- Fuel pressure loss or surging on FI bikes can indicate a leak on the high-pressure side or a failing return line.
I inspect along the full length, squeeze for soft spots, and run my fingers along clamps to feel for seepage. If I find damage or fuel smell, I stop riding and replace the affected hose immediately.
Safety Precautions Before Inspection
I will prepare the right tools, make sure the bike is cool, and remove fire risks before I touch any fuel lines. Taking these steps protects me and prevents damage to the motorcycle.
Gathering Required Tools
I gather tools that let me work cleanly and safely. I use nitrile gloves, safety glasses, a flashlight, a small mirror, and a clean rag. For the fuel lines themselves I keep a set of screwdrivers, pliers, hose clamp pliers, and a short length of clear fuel-safe tubing to test flow. I also bring a small drain pan and absorbent pads to catch spills.
I keep a fire extinguisher rated for flammable liquids (Class B) within arm’s reach. If I need replacement clamps or new hoses, I check size and material compatibility before starting. For reference on compatible hose types and fittings, I consult manufacturer guidance or a trusted source like the Motorcycle Safety Foundation or a factory service manual.
Ensuring the Motorcycle Is Cool
I always let the engine and exhaust cool completely before working on fuel lines. Hot components can ignite fuel and make hoses brittle, so I wait at least 30–60 minutes after riding. I touch the exhaust pipe carefully and use a thermometer if I’m unsure.
I move the motorcycle to a shaded, well-ventilated area. I secure it on a center stand or paddock stand so it won’t tip while I inspect hoses that run under the tank or frame. If the bike was parked in direct sun, I lift plastic covers and let trapped heat escape before touching lines.
Preventing Fire Hazards
I disconnect the battery’s negative terminal to prevent sparks when loosening clamps or removing lines. I avoid smoking, open flames, and running equipment near the bike. I also clear the work area of rags soaked in fuel and store them in a metal container away from the motorcycle.
I drain small amounts of fuel into a labeled, approved container only when necessary and clean spills immediately with absorbent pads. If I smell a strong fuel odor or find a large leak, I stop and call a professional. For guidance on fire safety and handling flammable liquids, I refer to resources from the U.S. Fire Administration or similar authorities.
Locating Fuel Lines on Your Motorcycle
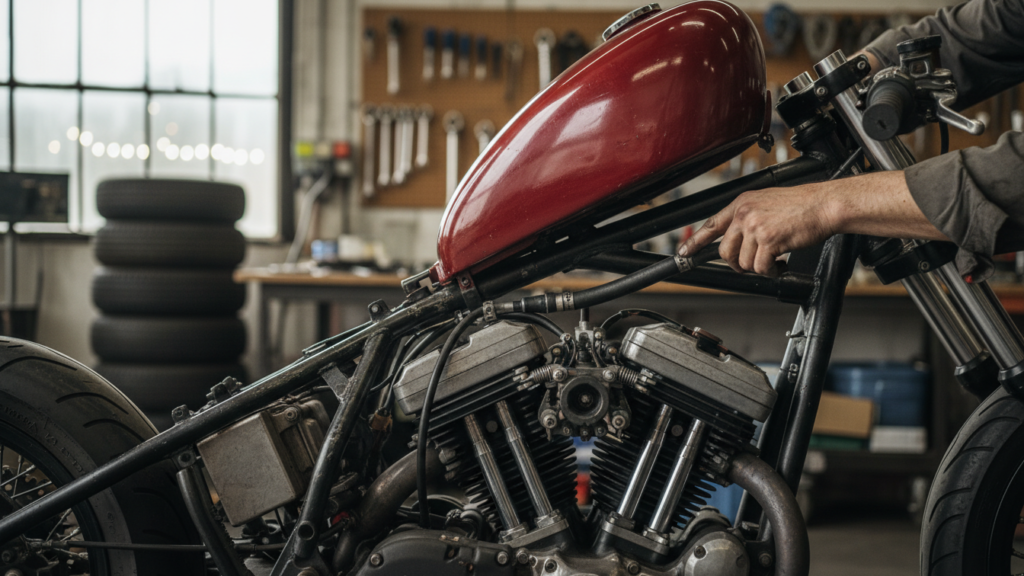
I will show you where fuel lines usually run, how to find them on your bike, and what to look for at their connections. Focus on the tank, petcock, carburetor or fuel pump, and the route under the seat and frame.
Consulting the Owner’s Manual
I start with the owner’s manual because it gives the exact layout for my bike. Look for the fuel system or fuel line diagram—many manuals include labeled drawings showing the tank, petcock (fuel valve), filter, and feed line to the carburetor or fuel pump.
If you don’t have a paper copy, check the manufacturer’s website or a PDF service. The manual also lists recommended hose sizes and clamp types, which helps when I replace lines or order parts.
Use the manual’s safety notes too. It tells me how to depressurize systems or turn the petcock to OFF before disconnecting hoses, which reduces fire and spill risks.
Recognizing Fuel Line Routes
Fuel lines usually run from the fuel tank outlet, along the frame, to either a carburetor or an in-tank/outboard fuel pump. On most street bikes, I find the lines under the seat or alongside the backbone frame tube. On dirt bikes, lines may snake down the tank’s underside and hug the frame to avoid damage.
Black rubber or braided lines are common; newer bikes sometimes use reinforced or fuel-injection-rated hoses marked with “fuel” or a pressure rating. I follow the hose visually from the tank to the engine to map the route before touching anything.
Look for protective sheathing, zip ties, and heat shields. These show where manufacturers expect the line to run and where it’s safest to access or clamp.
Identifying Connections and Clamps
I inspect every junction: tank to petcock, petcock to fuel filter, filter to fuel pump/carburetor. Common fittings include barbed connectors with worm-gear clamps, crimped sleeves, and quick-disconnects on fuel-injected bikes.
Check clamps for rust, loose screws, or missing crimps. If a clamp is a spring-type, press the tabs to test tension. For worm-gear clamps, feel the screw; it should be snug but not cutting into the hose.
At quick-disconnects, depress the release and gently pull — it should separate cleanly. I also look for fuel odor, wet spots, or cracked hose near fittings; these signs mean a connection needs replacement or tightening.
Step-By-Step Guide to Checking Fuel Lines
I focus on three quick checks that catch most problems: look for visible damage, sniff for fuel where it shouldn’t be, and feel the hose to test for stiffness. Use a flashlight, a clean cloth, and gloves before you start.
Visual Inspection for Cracks or Leaks
I start by tracing the entire length of each fuel line from the tank to the carburetor or injector. I look at the hose where it bends and where clamps join fittings, since cracks and splits most often appear at those points.
I wipe the lines with a clean rag to remove grime so small leaks become visible. I check for wet spots, dark stains, or shiny fuel residue. If I see a drip, bubble, or a wet bead forming while the engine runs briefly, I stop and replace the hose.
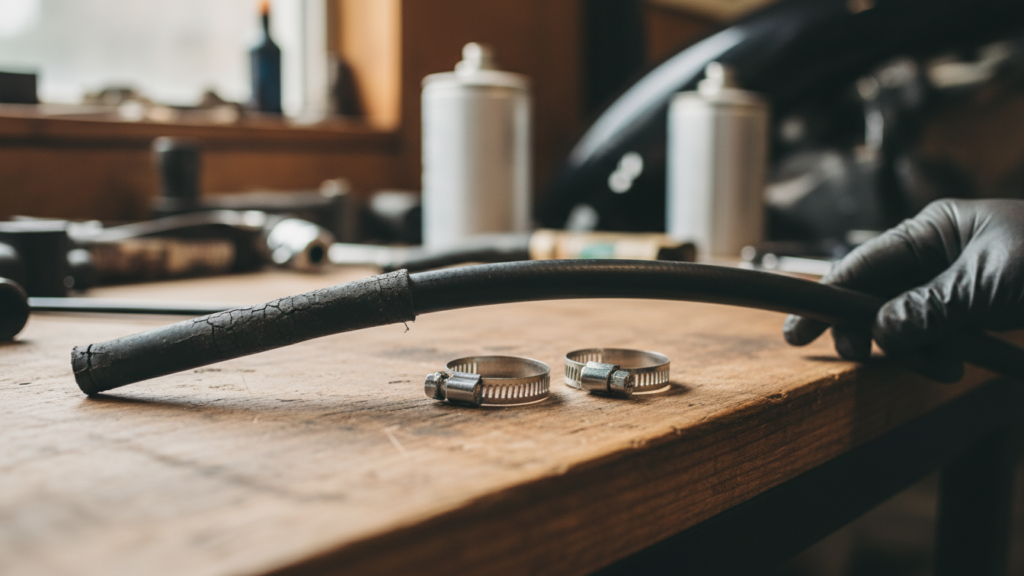
I also inspect clamps and fittings. I tighten loose clamps carefully and replace corroded clamps. If the hose has cuts, swelling, or fuel-soaked areas, I mark the section for replacement rather than trying a temporary patch.
Checking for Fuel Odor
I turn off the engine and let the bike sit for a few minutes to concentrate any leak smell. I crouch down and sniff around the tank, along the lines, and near the engine bay, moving slowly to detect the strongest source.
If I smell fuel near a connector or under the bike, I trace the line in both directions to find the wettest or strongest-smelling area. Even a faint, persistent odor can mean a small leak that will get worse with vibration.
I avoid using matches, lighters, or anything that can spark while checking. If the smell is strong, I ventilate the area and do not start the engine until I repair or replace the damaged line.
Examining for Hardness or Brittleness
I pinch and bend each hose in several spots to test flexibility. A healthy fuel line flexes easily and returns to shape. If the hose feels hard, crusty, or cracks under light bending, it has become brittle and needs replacement.
I pay special attention to lines that are more than a few years old or that have been exposed to heat from the engine. Sun-bleached or discolored hoses often indicate material breakdown.
I also squeeze along the hose to check for soft, swollen sections that signal internal damage from ethanol or contaminants. Any hose that shows hard, soft, or uneven texture I replace, and I use fuel-rated hose and new clamps during installation.
Testing Fuel Line Functionality
I focus on two checks that show whether the fuel line and pump deliver fuel at the right pressure and volume. Both tests reveal leaks, blockages, weak pumps, or damaged hoses that need repair.
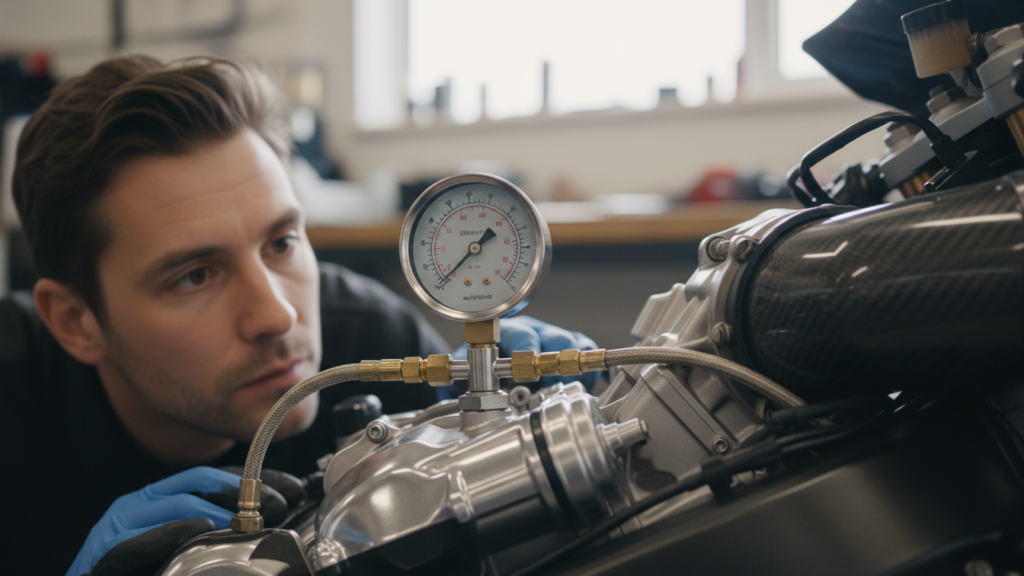
Performing a Pressure Test
I attach a fuel pressure gauge to the test port or inline at the fuel rail per the bike’s service manual. I turn the ignition to ON (do not start the engine) so the pump primes, and note the steady pressure reading. Compare that number to the manufacturer’s spec; a low reading usually means a weak pump, clogged filter, or leak.
If the bike lacks a test port, I use a fuel line adapter between the pump and carburetor/injector. I wear safety glasses and work in a ventilated area to avoid sparks or fumes. For gauge use and safe procedures, I reference the factory manual or a reliable guide like the Motorcycle Safety Foundation and a service manual from the maker.
Observing Fuel Flow
I disconnect the fuel line at a safe point and route it into a clean container to watch flow while the pump runs or the engine cranks. I measure volume over a set time (for example, milliliters per 30 seconds) and compare it to the spec in the manual. Slow or sputtering flow signals a clogged filter, collapsed hose, or failing pump.
I also inspect the fuel for debris, water, or varnish when it exits. Any dark particles mean tank cleaning and filter replacement. After testing, I reconnect lines, check clamps, and run the bike to confirm no leaks.
Cleaning and Maintaining Fuel Lines
I keep fuel lines free of varnish, debris, and cracks to prevent clogs and leaks. Good tools, correct cleaners, and regular checks make the system reliable and extend engine life.
Using Fuel System Cleaner
I choose a fuel system cleaner that matches my bike—carbureted or fuel-injected. For carburetors I use a solvent designed to remove varnish and gum; for fuel-injected bikes I pick a cleaner safe for injectors and seals. I follow the product dose on the bottle and add it to a nearly full tank to ensure proper mixing.
When treating a stubborn clog, I remove the line and flush it with fresh cleaner or use compressed air from the tank side to push residue out. I replace rubber hoses that feel stiff, cracked, or swollen after cleaning. I always wear gloves and work in a ventilated area to avoid fumes.
Regular Inspection Schedule
I inspect fuel lines every 3 months or every 1,000 miles, whichever comes first. I look for soft spots, cracks, hardening, bulges, and fuel smell around connections. I also check clamps and fittings for corrosion or looseness.
I run my hand along the line to feel for weak sections and squeeze connections to test seal tightness. If I spot any damage or fuel seepage, I replace the line and clamps immediately. I keep spare hose and stainless clamps in my toolkit for quick fixes.
When and How to Replace Fuel Lines
I check fuel lines often and replace them when I see clear signs of wear, incompatible material, or after a repair that disturbed the hose. I focus on safety, correct sizing, and secure fittings to prevent leaks or engine problems.
Signs Replacement Is Needed
I replace fuel lines when I find cracks, hardening, or soft spongy spots along the hose. Any visible fuel smell, wet spots, or stains near a line means immediate action. I also watch for fuel seepage at clamps and fittings; even small weeps can worsen under pressure.
If the hose shows bulges or blisters, the inner lining may have failed. I replace lines that are more than a few years old or that show dry rot from sun exposure. After a crash or impact I inspect the entire path and replace any line with abrasions or kinks.
Selecting Compatible Replacement Lines
I match diameter and material to the bike’s system. Most carbureted bikes use 1/4-inch (6mm) fuel hose; fuel-injected systems often require fuel-injection-rated hose that resists higher pressure. I verify the required inner diameter and check manufacturer specs before buying.
I choose hoses marked “fuel-injection” for EFI bikes and approved nylon or fluorocarbon lines where heat or ethanol exposure is a concern. I avoid generic rubber hose that isn’t rated for fuel or ethanol blends. For clamps, I pick stainless steel worm-drive or OEM-style clamps sized to the hose.
Installation Tips
I work in a well-ventilated area with the battery disconnected and a fuel catch pan under the tank. I relieve fuel pressure if the system is pressurized, then remove old clamps and slide the hose off fittings carefully to avoid spreading fuel.
I cut new hose squarely with a sharp blade and push it fully onto the fittings. I position clamps 2–3 mm from the hose end, tighten evenly, and avoid overtightening which can damage the hose. I route the hose away from heat sources, sharp edges, and moving parts, and secure it with zip ties or retainers to prevent chafing.
After installation I check for leaks by turning the key to the on position (no start) or briefly running the pump, then re-tighten clamps if needed. I inspect again after a short test ride.
Professional Help and Further Resources
I recommend a mechanic when the fuel line shows cracks, hardening, or active leaks I can’t fix safely. A pro has the tools to test fuel pressure and flow, and to replace petcocks or hard-to-reach hoses without causing spills.
If you prefer learning more before visiting a shop, I use these quick resource types:
- Service manuals for your bike model (factory or Haynes).
- Video walk-throughs that show fuel pressure and flow tests.
- Parts diagrams to identify hose routes and fittings.
I also suggest asking a shop these specific questions before work begins:
- Do you test fuel pressure and check the petcock?
- Will you replace fuel lines with OEM or rated aftermarket hoses?
- Can you show me the failed parts after removal?
For safety and parts, I keep a short checklist with me:
| Item | Why it matters |
|---|---|
| Model-specific service manual | Shows hose routing and torque specs |
| Fuel-rated replacement hose | Prevents future leaks |
| Nitrile gloves & drip tray | Keeps fuel off skin and bike |
If you decide on DIY after research, I can point you to trustworthy manuals and testing videos for your motorcycle. If anything feels beyond my skills, I call a certified mechanic rather than risk a fuel leak or fire.
FAQs
What tools do I need for a basic inspection?
A flashlight, gloves, and a clean rag are enough for a quick check. For deeper tests I use a pressure gauge and replacement clamps.
How frequently should I inspect fuel lines?
I inspect them at every oil change or at least every 3–6 months on older bikes. Newer bikes with OEM lines may need less frequent checks, but I still look them over regularly.
Can ethanol fuel damage lines?
Yes. Ethanol can harden or swell some rubber hoses over time. I replace lines that show stiffness, cracking, or swelling with ethanol-safe hoses.
When should I replace a fuel line?
Replace immediately if I see leaks, soft spots, or brittle cracking. Also replace any line older than five years or after long storage.
Is it safe to ride with a small leak?
No. Even a small leak is a fire risk. I don’t ride the bike until I fix the leak and test the system.
Do I need professional help?
If I can’t reach the leak, if fuel pressure is off, or if the tank needs removal, I seek professional help. I also consult a mechanic for carbureted or fuel-injected diagnosis.
Conclusion
I recommend checking fuel lines at least every few months and after any rough ride. Small checks catch problems early and keep the bike safe.
I look for cracks, soft spots, swelling, and hardening by squeezing and bending the hose. I also inspect clamps and fittings for rust or looseness.
If I find leaks or damage, I replace the hose and clamps immediately. I use the correct fuel-rated hose and secure clamps to prevent future leaks.
I keep a short checklist in my phone: visual check, squeeze test, clamp tightness, and fuel smell. This quick routine takes only a few minutes and saves time and money later.
When in doubt, I consult the service manual or a mechanic. Fuel system work can be risky, and professional help avoids mistakes.