
You want a quick, simple answer: replace most motorcycle air filters about every 10,000–12,000 miles or roughly once a year, and check more often if you ride in dusty or wet conditions. I’ll show you how to spot a clogged filter and avoid performance loss or engine damage.
If you ride off-road, commute in dusty areas, or notice poor throttle response or lower fuel economy, inspect the filter more often. I’ll explain cleaning vs. replacing, what to look for during a quick check, and how to pick the right replacement so your bike runs strong.
Key Takeaways
- Check your air filter more often in dusty or wet riding conditions.
- A typical replacement interval is about 10,000–12,000 miles or annually.
- Clean or swap the filter when you see heavy dirt, damage, or performance drop.
Average Replacement Intervals
I recommend checking the air filter at regular service intervals and replacing it based on manufacturer guidance, bike type, riding conditions, and visible wear. Expect typical ranges but adjust for dusty riding, aftermarket filters, and older bikes.
Factory Recommendations
Manufacturers usually give a mileage or time interval in the owner’s manual. Common guidance I see is around 10,000 miles or once a year for many street bikes, but some models list 20,000–30,000 miles. Always follow the exact number printed in your manual because it accounts for the engine’s intake design and stock filter type.
If the manual gives a range, I replace the filter at the lower end when I ride in mixed conditions. For warranty-sensitive machines, I keep service records and use dealer parts when possible. You can check official service schedules on manufacturer websites or in your manual for model-specific values.
Differences by Motorcycle Type
Different bikes demand different intervals. Off-road and dual-sport motorcycles need much more frequent changes because they run in dusty, muddy environments. I change filters every few rides or every 1,000–3,000 miles when trail riding hard.
Cruisers and touring bikes generally last longer between changes because they ride on paved roads and draw cleaner air. Sportbikes with high flow intakes may require earlier replacement if they use foam or aftermarket performance filters. For correct fit and interval, consult the service page on the maker’s site or your owner’s manual.
Usage-Based Intervals
Your actual riding conditions drive when to change the filter. I treat these as practical rules:
- Urban/clean highway: inspect every 6 months, replace ~10,000 miles.
- Dusty/off-road: inspect every ride, replace every 1,000–3,000 miles.
- Heavy stop-and-go or salty coastal air: inspect more often and replace sooner.
If you use a reusable foam or oiled cotton filter, follow the cleaning schedule the maker recommends. Proper cleaning and re-oiling can extend service life, but I replace if the filter shows damage or permanent staining.
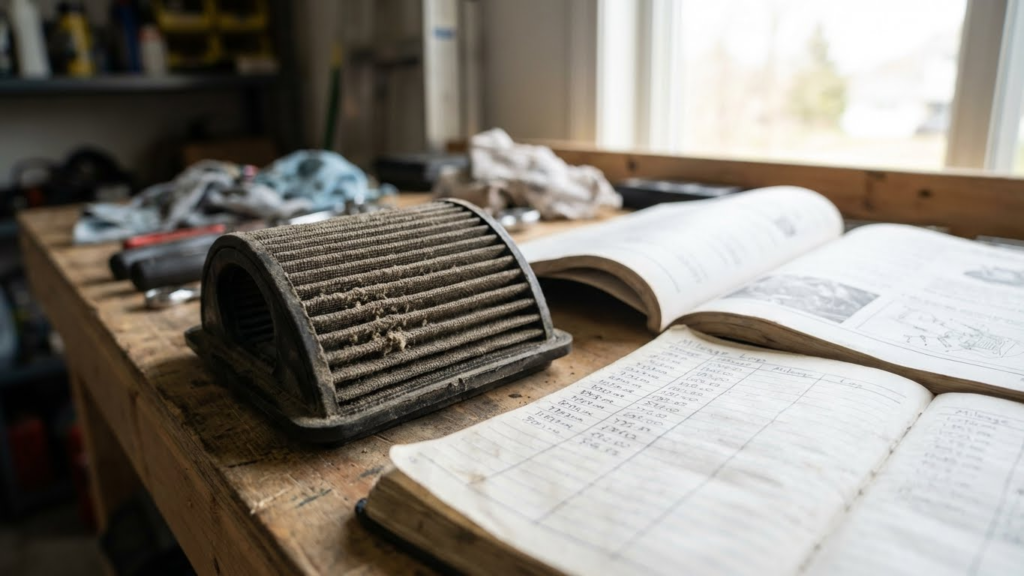
Signs It’s Time for Replacement
Watch for these clear signs: visibly dark or clogged media, reduced throttle response, poor fuel economy, and black smoke from the exhaust. I also check for tears, compressed foam, or a gap in the seal around the filter housing.
Use a simple light test: hold the filter up to a bright light; if little light passes through, it’s time to replace. If the engine runs rough after a long dusty ride or the bike loses power under load, change the filter before risking further engine wear. For guidance on inspection and cleaning methods, I refer to resources like the Motorcycle Safety Foundation and manufacturer service guides.
Factors Affecting Air Filter Lifespan
I’ll focus on the main things that shorten or extend a filter’s life: where you ride, what the filter is made of, and how you care for it. These three areas determine whether a filter lasts a few thousand miles or over ten thousand.
Riding Environment and Conditions
Riding on dusty dirt roads, through construction zones, or on unpaved trails fills the filter fast. I replace or inspect filters every 3,000–6,000 miles when I ride off-road or in dusty conditions. Urban commuting on paved streets with little dust can stretch that to 8,000–12,000 miles.
Wet, salty air near coasts can also clog and corrode parts faster. I check filters sooner after riding in rain or salt spray, because wet dirt packs more tightly. High pollen seasons and heavy traffic with diesel soot mean I inspect the filter more often too.
Filter Material Types
Paper (disposable) filters trap particles well but clog sooner. I change paper filters at recommended intervals because cleaning them damages the paper. Foam filters are common on off-road bikes; I wash, oil, and reuse them regularly. Proper oiling restores their ability to trap dust.
Cotton gauze or oiled performance filters last longer and flow better, but I clean them carefully and re-oil to avoid engine issues. Higher-quality filters usually cost more but may last two to three times longer if I maintain them properly.
Maintenance Habits
Regular inspection matters more than mileage alone. I visually check the filter every few oil changes or about every 2,000–3,000 miles. If the filter looks gray or packed with dirt, I service or replace it regardless of the odometer.
Cleaning technique and frequency matter. I use manufacturer-approved cleaners and oils, avoid over-oiling, and let parts dry fully before reinstalling. Tight airbox seals and correct installation also prevent premature clogging, so I always confirm the airbox is sealed after I work on the filter.
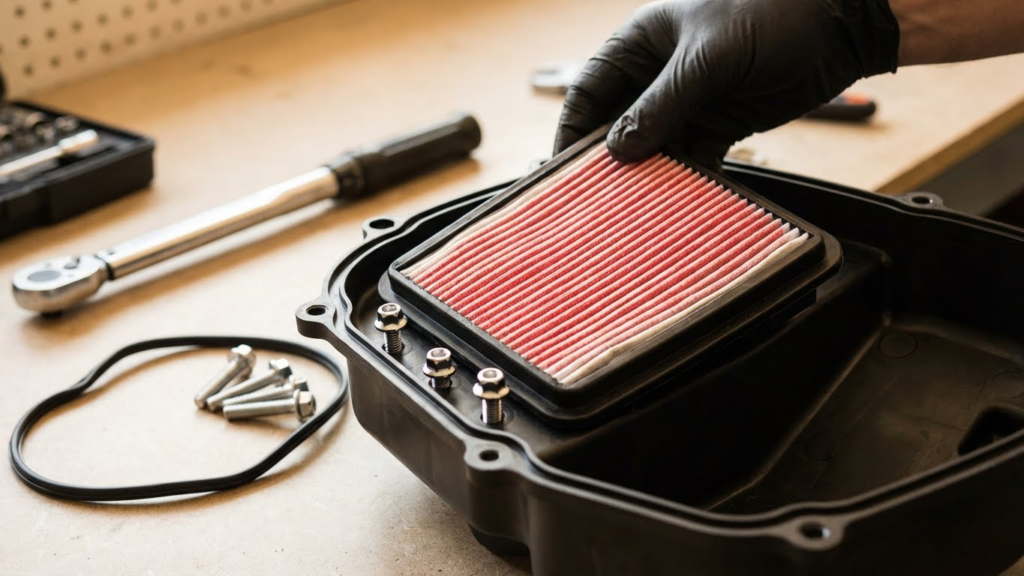
How to Inspect a Motorcycle Air Filter
I check the air filter regularly because clean air keeps the engine running well and saves fuel. I focus on where the filter sits, how dirty it looks, and whether damage or oil is present.
Visual Inspection Steps
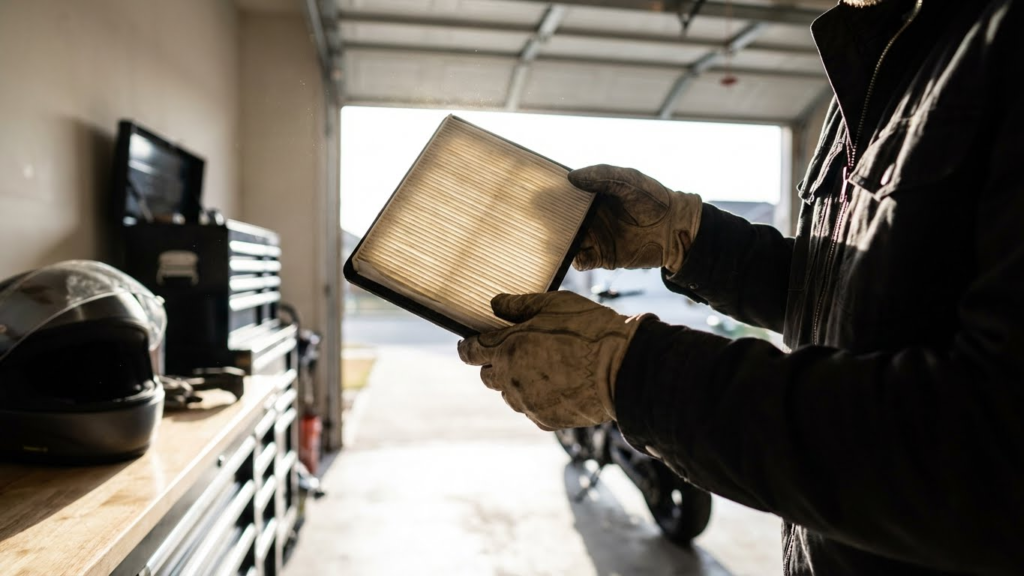
I start by locating the filter, usually under the seat or a side panel. I remove the panel or tank per the owner’s manual and lift the filter out carefully to avoid dropping dirt into the airbox.
I hold the filter up to good light and look for packed dust, holes, or tears. For foam filters I squeeze to feel for brittle spots; for paper or cotton filters I spread the pleats to check inside. I also inspect the airbox and intake snorkel for loose debris or oil.
I note the filter’s age and ride conditions. If it’s more than a year old or I ride off-road or in dusty areas, I inspect more often. I wear gloves if the filter is oily or dirty to keep my hands clean.
Warning Signs of a Dirty Filter
I look for heavy dust caked into the media that blocks light when held up. If the pleats are full of soot or the foam has dark, ingrained grit, airflow is reduced and performance will drop.
I watch for oil saturation on foam filters beyond normal light coating. Excess oil can trap more dirt and smell like running rich. I also check for holes, rips, or crumbling edges; any of those let unfiltered air into the engine.
Engine symptoms also warn me: reduced acceleration, rough idle, black smoke, or increased fuel use often tie back to a clogged filter. If I see any of these signs paired with a dirty element, I act rather than wait.
When to Clean Versus Replace
I clean foam filters when they are dirty but intact and not hardened. I wash them with the correct cleaner, let them dry, then reoil lightly and reinstall. I follow manufacturer guidance on oil type and amount.
I replace paper or cotton filters when they show heavy clogging, oil contamination, or physical damage. Paper filters do not clean well; attempting to force-clean them often deforms the pleats and reduces filtration.
I also replace filters on a schedule: roughly every 10,000 miles or annually for street bikes, sooner for dusty or off-road use. When in doubt, I choose replacement to protect the engine.
Consequences of Not Replacing the Air Filter
I will explain the main risks you face when you let the air filter go too long without replacement: reduced engine power, rough running, and higher fuel use. These problems come from restricted airflow and dirt entering the engine.
Engine Performance Issues
A clogged filter limits the air that reaches the combustion chamber. I notice reduced throttle response and slower acceleration when airflow is restricted. The engine may feel sluggish at low RPM and struggle to reach higher speeds.
Dirty filters also let abrasive particles bypass the filter and wear cylinder walls, piston rings, and valves. Over time this can cause lower compression and oil contamination. I sometimes see increased smoking and more frequent need for valve adjustments or engine repairs.
If your bike has fuel injection, the engine control can’t fully compensate for reduced airflow. That mismatch causes rough idling, hesitation under load, and sometimes stalling at stoplights. Carbureted bikes can run rich and require rejetting or more frequent spark plug changes.
Fuel Efficiency Impact
A restricted air filter changes the air/fuel mix, usually making the engine run richer. I detect this as higher fuel consumption during normal rides and noticeable drop in miles per gallon.
Running rich also fouls spark plugs faster. I replace plugs more often when the filter is dirty because deposits lower ignition efficiency. That makes starts harder and increases misfires under acceleration.
In extreme cases, fuel economy loss becomes measurable: you will fill up more often and spend more on gas. Fixing the filter is a low-cost step that often restores the factory fuel mileage and reduces related maintenance like plug and injector cleaning.
Best Practices for Air Filter Maintenance
I focus on simple, regular steps that keep the filter clean, fit it correctly, and use the right tools so the engine breathes well and parts last longer.
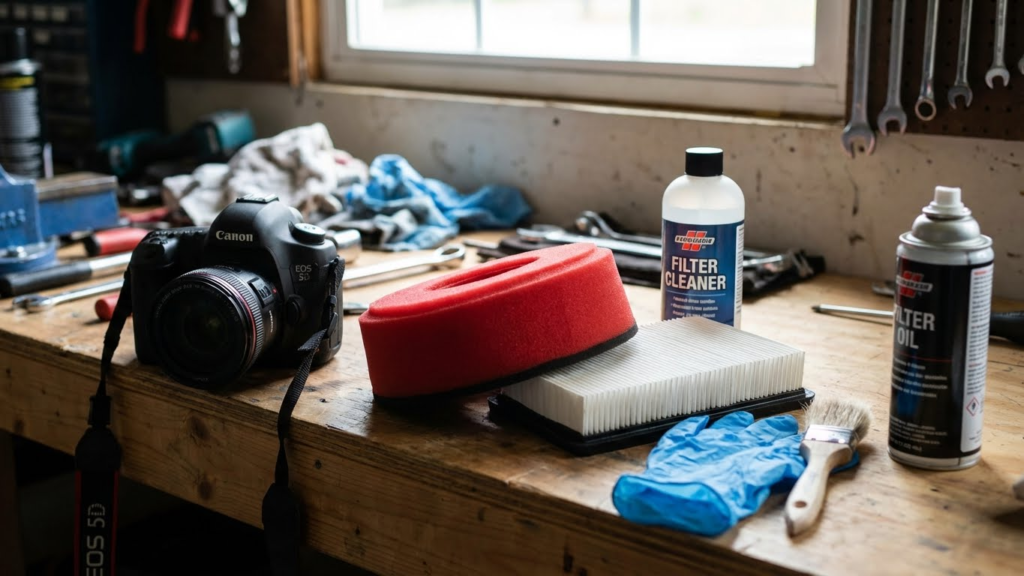
Cleaning Procedures
I clean foam, cotton, and paper filters differently. For foam filters, I remove the filter, wash it in warm soapy water, rinse until clear, and let it dry completely. I then apply the correct filter oil sparingly and work it into the foam so coverage is even but not dripping.
For washable cotton filters, I use a commercial filter cleaner or mild degreaser, rinse with low-pressure water from the inside out, and air-dry. I re-oil only with the manufacturer’s recommended oil and amount.
Paper filters cannot be washed. I tap them gently to remove debris and replace them when clogged. I always inspect the filter housing and intake for debris before reinstalling. For reference on cleaning steps and products, I use guidance from OEM manuals and resources like the Motorcycle Safety Foundation and manufacturer service pages.
Recommended Tools
I keep a small kit for filter maintenance. Essentials include a set of metric sockets or screwdrivers to open the airbox, a soft brush for light debris, and a parts-cleaning brush for foam or cotton. I use a disposable tray or cloth to catch old oil and dirt.
For washing and drying, I use a bucket, mild detergent, and compressed air at low pressure to speed drying (never exceed 30 psi on the filter). I use a specific filter oil applicator or spray for even coverage. I also keep replacement filters and a torque wrench if the airbox fasteners require specific torque. Using the right oil and tools prevents damage and leaks.
Proper Installation Techniques
I check the airbox seal, sealing surface, and mounting grommets before installing the filter. I install the filter so the sealing lip sits flat against the airbox; any twist or gap can let unfiltered air bypass the element. I hand-tighten clamps and screws first, then torque to the factory spec.
When using oiled filters, I wipe away excess oil from the intake and sensor mounting surfaces; too much oil can foul sensors. I run a brief engine idle after installation and listen for air leaks. If I smell fuel or notice poor idle, I recheck the seal and fasteners. For exact torque and oil type, I consult the bike’s service manual or the filter maker’s instructions.
Choosing the Right Replacement Air Filter
I focus on fit, filtration efficiency, and how the filter handles the conditions I ride in. I also weigh cost, ease of installation, and how the filter affects engine performance.
OEM vs Aftermarket Options
I choose OEM when I want exact fit and factory-tested performance. OEM filters match the bike’s intake shape and often include seals or gaskets that fit without modification. That reduces the risk of air leaks and tuning issues.
Aftermarket filters can offer better filtration or airflow for specific needs. I look for reputable brands, user reviews, and filtration ratings (micron size or MERV-like specs). Some aftermarket designs improve airflow for power at high RPM, but they may require jetting or ECU remap.
I avoid cheap, untested filters. They may fit but let in more dust or collapse under airflow. I also check whether an aftermarket filter keeps the stock maintenance interval or needs cleaning/replacement more often.
Filter Compatibility
I confirm compatibility with my exact make, model, year, and engine variant before buying. I check part numbers from the owner’s manual or dealer and compare them to the replacement product listing.
I verify physical dimensions, mounting hole locations, and seal type. Airbox shapes vary, so even similar models can use different filters. If the filter is washable/oiled, I confirm the cleaning process and whether it suits my riding environment.
I also check whether the new filter affects sensors or intake temperature readings. Some high-flow filters change air behavior and may need tuning to keep fuel trim and throttle response accurate.
Environmental and Seasonal Considerations
I check my air filter more often when I ride in dusty or sandy areas. Dirt clogs filters fast, so I inspect them every few rides if I ride off-road or on unpaved roads.
Rain and wet weather can trap mud and grit in the filter. I dry and inspect the filter after wet rides and replace it sooner if it shows signs of damage or heavy contamination.
Pollen and seasonal foliage increase debris in spring and early summer. I schedule an extra inspection during those months to keep airflow steady and the engine running well.
Coastal riding exposes filters to salty air and fine salt particles. I clean or replace filters more often near the sea to avoid corrosion and reduced performance.
I use this quick checklist to guide me:
- High dust (off-road, construction): inspect every 1,000–3,000 miles.
- Normal road riding: inspect every 5,000–10,000 miles or yearly.
- Wet or salty conditions: inspect after heavy exposure.
When conditions are extreme, I lean toward replacing rather than cleaning, especially with paper filters. For reusable foam or cotton filters, I follow the maker’s cleaning and oiling steps and replace if cleaning doesn’t restore airflow.
Cost Considerations for Replacement
I consider both parts and labor when I plan for an air filter change. A basic paper filter usually costs between $10 and $30, while a high‑flow or foam filter can run $30 to $100 or more. Prices vary by brand and motorcycle model.
If I do the work myself, I save on labor but need basic tools and time. Most riders can swap a filter in 15–45 minutes, depending on access. I factor in my time value when comparing DIY vs shop service.
A shop will add labor charges, typically $40–$120 depending on location and complexity. If the airbox or hoses need cleaning or replacement, that raises the bill. I always ask for an itemized quote before agreeing to work.
I keep a small checklist to control costs:
- Check manufacturer part number to avoid buying the wrong filter.
- Compare OEM vs aftermarket prices and warranties.
- Inspect the airbox and seals to avoid repeat service.
I treat regular filter changes as preventative spending. A modest filter now can prevent more costly engine or fuel‑system issues later. That choice often saves money over time.
Summary of Key Points
I recommend checking your motorcycle air filter at least every few thousand miles. For many bikes, I suggest replacing it around 10,000 miles or once a year if you ride mostly on paved roads.
If you ride off-road, in dusty conditions, or in heavy traffic, I advise checking and cleaning or replacing the filter much more often. Racing and motocross riders may service the filter after every ride.
I note manufacturers’ manuals first; they give model-specific intervals and filter types. Paper, foam, and oiled cotton filters behave differently, so follow the maker’s guidance when available.
I keep an eye and hand test in my routine: a visual check for heavy dirt, clogged pleats, or oil buildup guides action. If the filter looks packed with debris or restricts airflow, replace it.
Maintenance habits extend engine life and fuel efficiency. A clean filter prevents dirt from entering the engine and keeps performance steady.
Below is a quick reference:
- Typical road use: replace ~10,000 miles or yearly
- Dusty/off-road use: inspect every ride or every few hundred miles
- Racing/motocross: clean or swap after each session
I balance these rules with your riding style and environment to choose the right schedule.
What signs tell me the filter needs replacing?
Look for reduced power, rough idling, higher fuel use, or a visibly dirty filter. A clogged filter often looks dark and packed with debris.
FAQs
I get asked how often to change the air filter a lot. I recommend checking it every 3,000–5,000 miles if you ride on dirt roads or in dusty conditions, and about every 10,000–12,000 miles or once a year for mostly street riding.
Can I clean the filter instead of replacing it?
Yes, many foam and reusable cotton filters can be cleaned and re-oiled. Paper filters usually need replacing when dirty.
How do riding conditions change the schedule?
Dusty, wet, or salty environments shorten filter life. Frequent low-speed riding in traffic can also cause faster buildup.
Do different filters affect performance?
Higher-flow performance filters can boost airflow but may need more frequent cleaning. Always use a filter that fits your bike and follow the maker’s guidance.
What if I ignore it?
A clogged filter can reduce engine life and performance. I advise inspecting the filter regularly and replacing it when performance drops.
Quick checklist:
- Inspect visually every few rides.
- Replace annually or at 10k–12k miles for normal use.
- Replace sooner for off-road or dusty use.
Conclusion
I recommend checking your air filter at least once a year or every 10,000 miles as a general rule. Riding in dusty or wet conditions means I check and service it more often, sometimes as frequently as every few rides for off-road use.
A clean filter keeps the engine breathing and saves fuel. I replace disposable filters when they look clogged and I clean or oil reusable filters according to the maker’s instructions.
If I notice reduced power, rough idle, or worse fuel economy, I inspect the filter right away. Those signs often point to a dirty filter and fixing it is usually quick and inexpensive.
Quick checklist:
- Inspect filter every 6–12 months or 5–10k miles.
- Inspect sooner in dusty, wet, or off-road conditions.
- Clean or replace based on type and condition.
I trust routine checks to prevent bigger engine problems and to keep my rides smooth.