
You want a clear, safe answer fast: aim for about 20–30 mm (3/4–1 1/4 in) of free play in the middle of the chain’s bottom run on most street bikes, or follow your motorcycle’s manual for the exact spec. Too loose and the chain can skip or come off; too tight and you wear bearings, sprockets, and the chain itself.
I’ll show you how to measure that play, how often to check it, and what signs mean the chain needs tightening or replacement so you can keep the bike smooth and reliable. Stay with me and you’ll learn a simple routine that saves money and prevents breakdowns.
Key Takeaways
- Check chain slack regularly and follow the bike’s spec for safe tolerance.
- Proper slack prevents drivetrain damage and keeps suspension working right.
- Measure, adjust, and inspect the chain on a set schedule to avoid failures.
Why Proper Chain Tension Matters

I explain why chain tension affects safety, power delivery, and part life. Get the tension right to avoid crashes, loss of power, and expensive replacements.
Safety Implications
I check chain slack before every ride because a wrong tension can cause sudden hazards. A too-tight chain can bind the rear wheel during suspension movement and lead to wheel hop or loss of control at speed. A too-loose chain can skip teeth or derail, which can jam the wheel or fling the chain off the sprocket.
I watch for signs like stiff links, noisy drivetrain, or the chain hitting the swingarm. If any of those appear, I stop and adjust the tension or secure the chain guard before riding. Proper tension also reduces the chance of a snapped chain, which can damage the engine case or cause a crash.
Impact on Performance
I tune chain slack to maintain consistent power transfer from the engine to the rear wheel. Correct slack—typically a small amount of free play specified by the manufacturer—lets the suspension move without changing chain load, so acceleration stays smooth.
Too-tight chains sap horsepower by creating extra friction in bearings and sprockets. Too-loose chains cause uneven power pulses as the chain stretches and rebounds over teeth. Both reduce acceleration, throttle response, and fuel efficiency. I adjust tension after cleaning, lubricating, or replacing parts to keep performance predictable.
Wear and Tear Prevention
I protect sprockets, bearings, and the chain itself by keeping the correct slack. Over-tightening increases stress on sprocket teeth and gearbox output bearings, speeding up failure. Under-tensioning lets the chain work its way across sprocket teeth unevenly, causing hooked teeth and rapid chain elongation.
I follow a routine: inspect for wear, clean and lube the chain, then set slack per the shop manual. Regular checks every few hundred miles or monthly for heavy use help catch early wear. This simple routine saves money by extending chain and sprocket life and reducing the chance of sudden part failure.
Understanding Recommended Chain Slack
I focus on the exact slack numbers you should aim for, why they matter, and how different chain types and manufacturers change those numbers.
Typical Chain Slack Measurements
Most street bikes specify 20–35 mm (0.8–1.4 in) of vertical movement measured at the midpoint between sprockets. Off-road and motocross bikes often allow 30–50 mm to accommodate suspension travel and rough terrain. Sportbikes and smaller-displacement commuter bikes commonly sit near the lower end of the range.
Measure slack with the bike on its side stand or rear stand, no rider on the seat, and the transmission in neutral. Push the chain upward and downward at the midpoint and record the total travel; half the total travel from center is the usual spec listed in manuals. For a quick reference and visual guide, I check manufacturer specs or a reliable guide like the Motorcycle Safety Foundation or a factory service manual.
Manufacturer Guidelines
Manufacturers publish the exact slack in the owner’s manual and service manual for each model. I always follow the factory spec because it accounts for chain pitch, sprocket size, swingarm length, and intended use. Some brands list a tolerance band (e.g., 25 ± 5 mm); stay inside that band to avoid warranty or wear issues.
If the manual lists a range, set slack near the middle when the chain is new and tighten slightly as it wears. When in doubt, use the lower end of the range for heavy-load riding and the higher end for off-road or touring where suspension travel changes chain load. You can cross-check torque specs and wheel alignment from the same factory manual or a trusted source like SAE or the manufacturer’s online service pages.
Chain Types and Their Requirements
Different chain types need different attention. Standard roller chains (feed-and-drive street chains) usually follow the 20–35 mm rule. O-ring, X-ring, and sealed chains have similar slack ranges, but sealed chains can tolerate slightly tighter settings because lubrication stays put. I tighten sealed chains with care to avoid crushing the seals.
Heavy-duty and high-torque chains on cruisers or bikes with large rear sprockets may need a bit less slack to reduce stress on the gearbox output. Conversely, bikes with long-travel suspension or single-shock rear ends need more slack to prevent binding when the suspension compresses. For technical details on chain types and maintenance, I reference industry sources like the Motorcycle Industry Council and manufacturer tech pages.
How to Measure Motorcycle Chain Tension
I focus on measuring slack at the chain’s midpoint and use simple tools to get a repeatable, accurate reading. I check with the bike on its sidestand or center stand and note the manufacturer’s slack spec before I begin.
Necessary Tools and Equipment
I use a rigid ruler or a tape measure, a marker or piece of tape to mark reference points, and the bike’s owner manual for the correct slack spec. A center stand or paddock stand helps but a firm sidestand works if the bike is stable. I keep a small flashlight or phone light handy for better visibility in tight spaces.
A wrench or socket set is useful if I need to loosen axle or adjuster nuts, and a torque wrench helps when I retighten to spec. Gloves protect my hands and a rag wipes grease from the chain so markings stay clear.
Step-by-Step Measurement Process
I park the bike on level ground and support it so the rear wheel can move slightly. I find the midpoint of the lower chain run between front and rear sprockets and mark that spot with tape.
I push the chain upward with moderate finger pressure, noting the highest position. Then I pull it down to the lowest position and note that measurement. The difference between those two positions is the chain slack. I compare that slack to the value in the owner’s manual, usually given in millimeters or inches.
If the chain has too much or too little slack, I loosen the rear axle and adjust the chain adjusters evenly on both sides until the measured slack matches the spec. I retighten the axle to the correct torque and recheck the slack after a short test ride.
Common Measurement Mistakes
I avoid measuring with the bike on uneven ground or with the rear suspension fully compressed, as that gives a false reading. I also don’t measure at the top run; the bottom midpoint is the correct place for consistent results.
I don’t use a flexible tape that sags or estimate by eye. That often leads to over- or under-tightening. Finally, I always recheck alignment and torque after adjustments; a correct slack with misaligned wheels will still cause premature wear.
Adjusting Your Motorcycle Chain Correctly
I will show step-by-step how to loosen the axle, align the wheel, and tighten the chain so the chain has correct slack, the rear wheel stays straight, and the axle torque is safe.
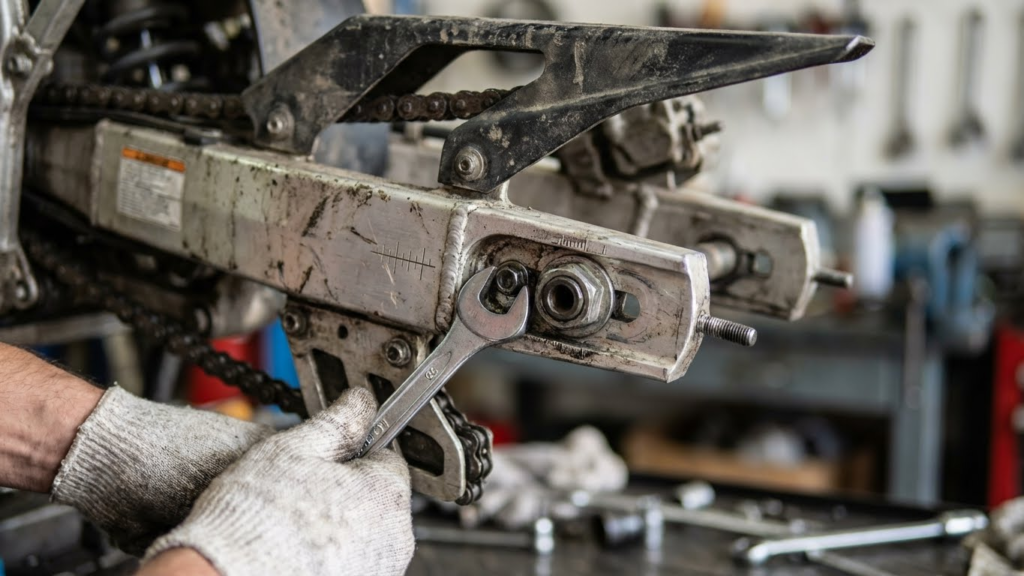
Loosening the Axle
I park the bike on level ground and use a center stand or paddock stand so the rear wheel hangs free. I first loosen the axle nut to the point the wheel can move in the swingarm slots but don’t remove it. Back off the chain adjuster locknuts on both sides by a few turns so the adjuster bolts can turn freely.
I mark the axle position with a paint pen or tape to keep track of movement. If your bike has a torque arm or safety washer, I make sure they remain accessible and note their orientation. For some designs I slightly lift the rear of the bike to relieve chain tension before making major adjustments.
Aligning the Rear Wheel
I align the rear wheel by using the swingarm marks or the adjuster pointer marks on both sides. I turn the adjuster bolts equally on each side to move the wheel forward or backward while keeping the same number of threads visible.
I check alignment by measuring from a fixed point on the swingarm to the rear sprocket on both sides, or by stretching a straight edge or string along the chainline. If available, I use the motorcycle’s service manual specs for chainline and axle torque. For extra reference on wheel alignment best practices, I use guidance from manufacturer manuals or trusted sources like the Motorcycle Safety Foundation for safe setup (https://www.msf-usa.org).
Tightening Procedures
I set chain slack according to the bike’s spec, usually measured at the midpoint between sprockets. I press the chain up and down and measure the free movement; typical values range from 20–40 mm depending on model. I adjust until the measured slack matches the manual.
I torque the axle nut to the specified value while holding the wheel in position to avoid shifting. Then I tighten the adjuster locknuts and re-check the slack. Finally, I spin the rear wheel to settle the chain, re-measure slack, and re-torque the axle nut. For torque specs and detailed steps, I consult the manufacturer service manual or a reliable motorcycle maintenance guide like Haynes (https://www.haynes.com) to confirm values.
Signs Your Chain Tension Is Incorrect
I check chains for sound, movement, and visible slack because those clues tell me whether the chain risks damage or a breakdown. Listen, watch, and feel the chain at slow speeds and while stationary to spot problems quickly.
Unusual Noises
I listen for grinding, rattling, or a rhythmic metallic clack when I roll the bike slowly in gear or rev the engine in neutral. A tight chain often causes a high-pitched whining or harsh grinding that changes with throttle. A loose chain can slap against the swingarm or sprocket teeth and make a thumping or clunking sound.
I isolate noises by lifting the rear wheel and turning it by hand while watching the chain path. If the sound appears only when load changes, that points to tension issues rather than worn sprockets or bearings. I address persistent unusual noises before long rides.
Chain Jumping or Skipping
I watch for the chain skipping over sprocket teeth during acceleration or when I let off the throttle. Skipping feels like sudden loss of drive or a sharp jolt underfoot. This can happen if the chain is too loose, the sprocket teeth are hooked or worn, or if the chain has tight spots.
I test this by gently accelerating in a safe, controlled area and by checking the chain while rotating the rear wheel by hand. If the chain jumps at specific wheel positions, the chain likely has stiff links or is unevenly stretched. I replace or repair components if adjustment doesn’t stop the skipping.
Visible Slack or Tightness
I inspect the chain midway between sprockets and measure vertical movement. Manufacturers usually list a specific slack range (often a few centimeters). If the chain moves almost not at all, it’s too tight and can strain bearings and sprockets. If it droops heavily, it’s too loose and risks derailing.
I also look for uneven slack along the chain run. Tight spots show little movement at certain links; loose spots show extra sag. I mark the tight spot, clean and lube the chain, then adjust tension and recheck at multiple points to ensure consistent slack.
Potential Damage from Improper Chain Tension
I focus on the real harms a chain can cause when it’s too loose or too tight. You’ll see how the sprockets, the chain itself, and the transmission parts suffer in clear, specific terms.
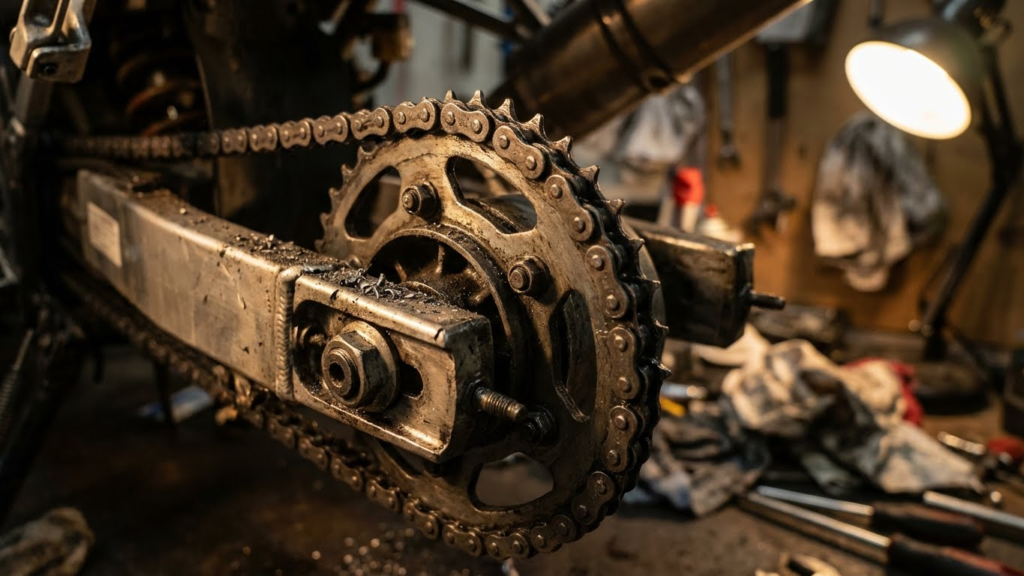
Sprocket Wear
I’ve seen sprockets wear unevenly when a chain runs with the wrong tension. A loose chain lets the teeth skip and hammer the sprocket, which rounds off tooth profiles and creates sharp, hooked teeth. That means the chain won’t seat properly and will accelerate wear on both sprocket and chain.
A tight chain changes the contact pattern. It loads the sprocket teeth constantly and increases pressure at a smaller contact area. That leads to premature tooth thinning and can deform the sprocket flange near the hub.
Signs I watch for: hooked teeth, visible thinning, metal shavings in the rear wheel area, and quick loss of chain alignment. Replacing sprockets is often required in pairs — front and rear — when wear becomes noticeable.
Chain Stretching or Breaking
I treat chain “stretch” as wear of the pins and bushings, not literal metal stretch. Too loose, and the chain slaps and cycles with shock loads. That speeds pin and bushing wear, increases pitch variance, and causes the chain to lengthen beyond service limits.
Too tight, and I see accelerated roller and pin fatigue. The constant tension raises internal stress and reduces the chain’s fatigue life. In severe cases, brittle failures occur at a pin or link and the chain can snap.
Watch for signs like increased slack over short intervals, tight spots that don’t flex, noisy operation, and difficulty adjusting to spec. A stretched or failing chain risks jamming the rear wheel or flinging links, which can be dangerous at speed.
Transmission Issues
I pay attention to drivetrain bearings and gearbox loads when chain tension is wrong. An overly tight chain pulls axial and radial loads through the rear sprocket into the wheel bearings and cush drive. That raises bearing wear and can cause premature failure of wheel or swingarm bearings.
Loose chains create torque spikes that transmit back through the sprocket to the output shaft and gearbox gears. That increases gear tooth stress and can cause chatter, accelerated gear wear, or damaged shift components over time.
Common symptoms I look for include rough shifting, whining from the final drive area, excessive play in the wheel hub, and hot or gritty wheel bearings. Fixing these issues often requires bearing replacement and inspection of gearbox seals and output shaft splines.
Routine Maintenance and Inspection Tips
I focus on three actions that keep a chain safe and long-lasting: cleaning off grit, keeping rollers lubricated, and checking slack and wear on a schedule. Each task takes a few minutes and uses simple tools.
Cleaning the Chain
I remove heavy dirt before lubing to stop abrasive particles from grinding the chain. I put the bike on a stand so the rear wheel spins freely. Then I use a stiff brush and a mild degreaser, working the cleaner into the links while rotating the wheel to reach the whole length.
I avoid wire brushes that can damage O‑rings. I rinse with low-pressure water or wipe with clean rags until no more grime comes off. After cleaning, I let the chain dry fully—about 10–20 minutes in warm weather—before lubricating.
Tools I use:
- Stiff nylon brush
- Degreaser (biodegradable)
- Clean rags
- Rear paddock stand or center stand
Chain Lubrication
I choose a chain lubricant made for my chain type (O‑ring, X‑ring, or non‑sealed). I apply lube to the inside of the lower run while slowly spinning the wheel so the lubricant reaches the rollers and pin interfaces.
I use one drop every 2–3 links until the rollers show a thin film. Then I let the bike sit 10–15 minutes so excess runs off, and I wipe away heavy buildup with a rag. I lubricate every 300–600 miles or after heavy rain or wet rides.
Lube tips:
- Apply to inner side of chain
- Avoid over‑spraying the sprockets and brake parts
- Reapply sooner if you ride in wet, dusty, or off‑road conditions
Regular Inspection Schedule
I check chain slack and condition before long rides and roughly every 500–1000 miles during normal use. I measure slack at the midpoint between sprockets by pushing the bottom run up and down; follow the motorcycle maker’s specified range in the owner’s manual.
I also inspect sprocket teeth for hooked or worn profiles, look for stiff or seized links, and check for rust or missing O‑ring seals. If the chain shows more than 1/2 inch (12 mm) of lateral play outside the spec, or if the sprockets are worn, I replace the chain and sprockets as a set.
Inspection checklist:
- Measure chain slack and compare to manual spec
- Spin wheel to spot stiff links or uneven movement
- Visually check sprocket tooth shape and rust
- Note unusual noise or vibration while riding
When to Replace a Motorcycle Chain
I check the chain for visible stretch and tight spots first. If the chain pulls away from the rear sprocket teeth when I lift it, the links may be worn and the chain needs replacing.
I measure chain slack and compare it to the maker’s spec. If the slack is beyond the recommended range even after adjustment, replacement is necessary.
I look for rust, stiff links, or damaged rollers. Any of these signs can reduce strength and cause sudden failure while riding.
I inspect the sprockets too. If the sprocket teeth are hooked, sharp, or unevenly worn, they will accelerate chain wear and both parts should be replaced together.
I watch for noise and poor throttle response during a ride. Excessive clatter, skipping, or jerky power delivery often points to a worn chain or mismatched components.
Quick checklist:
- Visible elongation or pull-away from the sprocket
- Slack outside spec after adjustment
- Rust, stiff links, or damaged rollers
- Hooked or worn sprocket teeth
- Noise, skipping, or poor throttle response
I replace the chain and sprockets together when possible. Doing so ensures even wear and a longer, safer service life.
FAQs
Can I ride with a loose chain?
I do not recommend it. A loose chain can skip teeth, slap the swingarm, or even derail. That raises the risk of damage and a sudden loss of drive.
What if the chain feels too tight?
If the chain is too tight it can strain the sprockets, bearings, and transmission output. I advise adjusting tension so the chain moves freely through its range without binding.
How often should I check chain tension?
I check mine every 500–800 miles or after heavy rain, long trips, or off-road use. New chains also need more frequent checks during the break-in period.
Should I adjust tension on the side stand or center stand?
I prefer the center stand or a paddock stand to get an accurate reading. If those aren’t available, use the side stand but be aware it can change the measured slack slightly.
What basic tools do I need?
I keep a wrench, torque wrench, and a ruler or ruler-like gauge. A rear-stand makes adjustments easier and safer.
Conclusion
I recommend checking chain slack regularly and using your bike’s service manual values when available. Most street bikes need about 20–40 mm (around 1/2 inch to 1.5 inches) of up-and-down play in the lower run, but your manual may give a different number.
I tighten or loosen the chain with the bike on its sidestand or center stand, and I recheck alignment and torque on the axle. I also inspect sprockets and the chain for wear each time I adjust tension.
I avoid making the chain too tight because that raises drivetrain wear and can stress bearings. I also avoid leaving it too loose since a loose chain can jump the sprockets or damage the swingarm.
If you want a quick checklist, I use this:
- Measure slack midway between sprockets.
- Adjust to the manual’s spec.
- Check sprocket wear and chain lubrication.
- Re-torque axle and recheck alignment.
I follow these steps to keep rides smooth, safe, and to make the chain last longer.